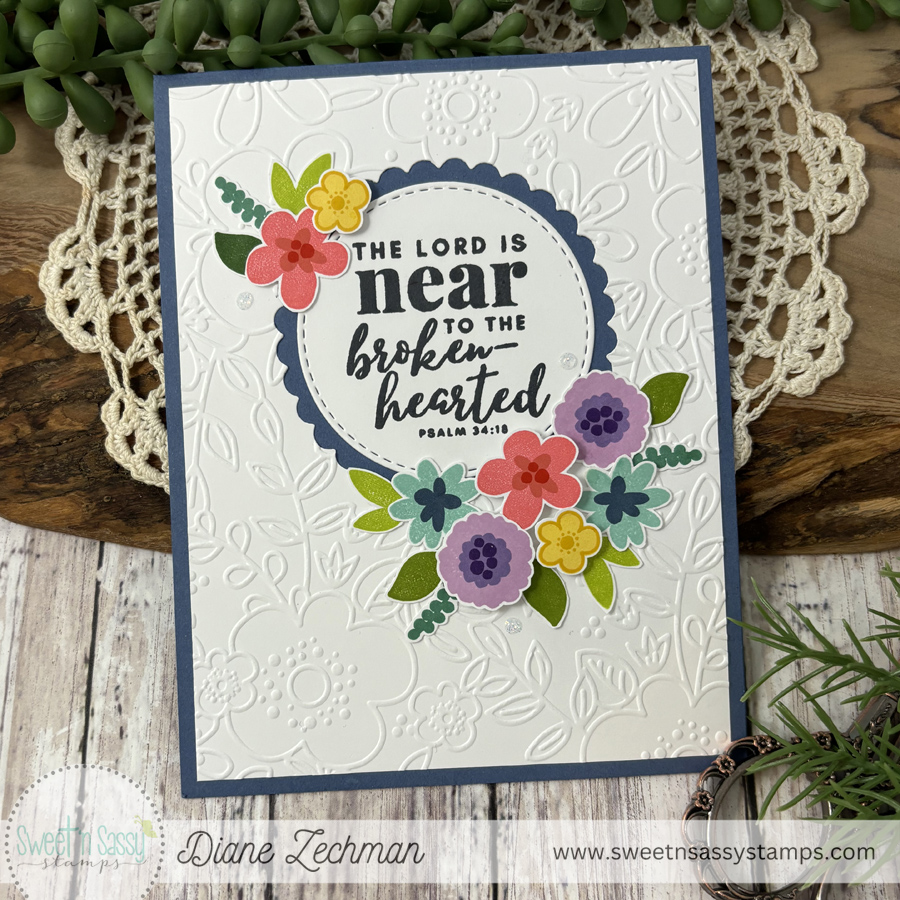
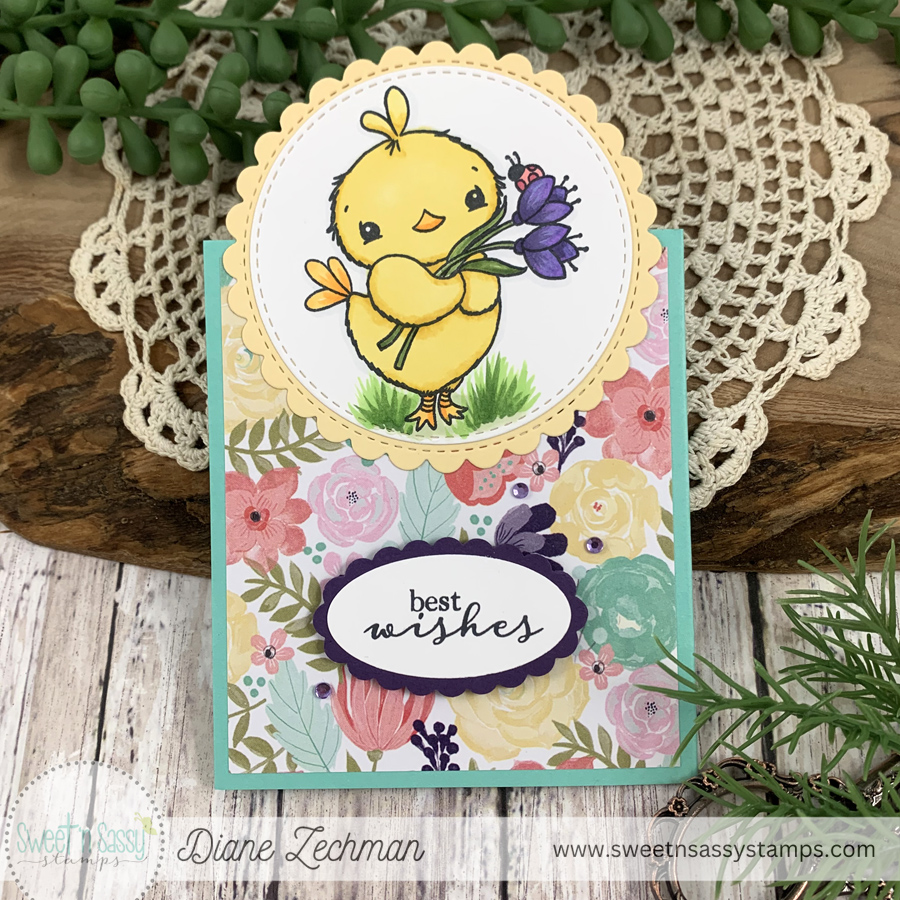
Oct 24 2008
Stampavie blog candy!
Yay! It’s the weekend! I am just popping on to let you all know that Stampavie is having some blog candy! They will be picking a winner tomorrow night. So go check it out *here* ! Have a great weekend! :0)
Oct 24 2008
Yay! It’s the weekend! I am just popping on to let you all know that Stampavie is having some blog candy! They will be picking a winner tomorrow night. So go check it out *here* ! Have a great weekend! :0)
Oct 22 2008
Something new is happening over at All That Scraps! Go check it out! Christine is offering some digital downloads of some cute new Halloween images….just in time to create some Halloween cards and treats. It’s so easy…just download them through the shopping cart (they are in a zip file), print, color & create! I have to admit that I was a bit skeptical at first…I love using the rubber stamps and have no desire to quit! BUT….I also have to admit that when I tried it, it was fun! And the bonus is that you can enlarge or reduce your images to suit your needs! Cool!
This first pic uses the cute Halloween house and one of the Sweet Pea images. After printing the house, I cut it out with my rectangle Nestabilities and colored it with Copic markers. (I had no bleeding of my printer ink with the Copics) :0) The Sweet Pea was cut out and popped up on dimensionals. And the skull on the green photo corner was hand drawn to match Sweet Pea’s necklace.
digital images- Sweet Pea Halloween- C.C. Designs
stamps- Sugarplum Halloween (sentiment)- C.C. Designs
paper- white, dp- K & Company and KI Memories
ink- Black
accessories- Copic markers, Photo Corner punch, Rectangle Nestabilities, Word Window punch
And here is a super quick bag topper. I used the pumpkins and Tiger the Cat to decorate it. They were both colored, cut out and attached to the topper. I used the Martha Stewart Cornice Edge punch along the bottom and doodled some faux stitches around the edge. Super quick & easy!
digital images- Sweet Pea Halloween- C.C. Designs
paper- White
ink- Black
accessories- Martha Stewart Cornice Edge punch, Copic markers, gel pen, clear bag
Oct 21 2008
This card was made with another sweet Sarah Kay image called Time For Apple Pie. It will soon be released at Stampavie (date not yet determined). The title alone makes me hungry. LOL. Mmmm…I can almost taste it.
I found my retired SU! stencil with an apple in it and decided to use it to frame the little girl. I started by stamping the image and laying the stencil over top. Then I sponged the color around the edges, being careful to avoid the main image. After the stencil was removed, I colored it with Copic markers and doodled around the edges.
The top of the card was embossed with the Cuttlebug Just My Type button border and I pierced some holes between the rows. Then I got out my sewing machine for some wacky stitches around the patterned paper.
stamps- Sarah Kay Time For Apple Pie- Stampavie
paper- Husk, White, Garden Green, dp- The Paper Company
ink- Black, Real Red, Garden Green
accessories- Sizzix leaves, gel pen, SU! retired Nature template, sponges, Cuttlebug Just My Type, sewing machine, ribbon, paper piercer, Prima, button
Oct 20 2008
It’s time again for the monthly DD/DDA challenge and this month Emily (WaterPixie) issued the challenge. Here’s the deets:
Challenge Focus: Create a Halloween card or treat holder.
Required Element: Googlie Eyes! We want to see those eyes jiggle!
Restricted Element: No pumpkins! You’ll have to use a different image associated with Halloween!
I have some Halloween candy to decorate up, but I thought it would be fun to do something other than chocolate. So I picked up some cans of Crunchy Cheetos…LOL. Hey, they’re orange, right? Well then, they’re perfect for Halloween. ;0)
I started by covering the can with some Halloween papers. Then I embossed the Cuttlebug Haunted House and swiped an old white craft ink pad over it. I cut it out, attached it, and applied Stickles to the moon and one window. My images were stamped and colored with Copic markers. They were also cut out and attached with red line tape. (I used red line tape on everything to assure that they would stay stuck on the curved surface.) To follow the required element, I added tiny wiggly eyes to the scared Lucky, the owl and the bat.
Here’s the top of the can. I decorated the lid too. You can see that I also added wiggly eyes to the ghost.
Have you made any unusual treats for Halloween? I’d love to see what you found to decorate!
stamps- Spooky, Spooky, Spooky and Sugarplum Halloween- C.C. Designs
paper- Black, White, dp- KI Memories and American Traditional
ink- Memento Black, Craft White
accessories- googlie eyes, Cheetos, red line tape, Cuttlebug Haunted Halloween, Copic markers, Stickles, circle Nestabilities
Oct 18 2008
Wow…has it been a whole week since I last posted? I won’t bore you with how crazy life has been. I finally had a chance to sit down and stamp so I made a birthday card that I needed to get in the mail. I just recently got this SU! set and I’m glad I waited because it is on sale for the month of October. Sometimes procrastination pays off. ;0)
The papers I used are from a Marcella (K & Company) pack that I found at Target last year. And the cupcake border along the bottom is from the SU! Cupcake wheel that matches the stamp set. The words were stamped on white cardstock and diecut with the Nestabilities Double Ended Tags. Then while the paper was still in the die, I sponged on some pink dye ink.
In this photo, you can see the shimmer on the frosting. After I watercolored the image, I painted some Coffee Shimmerz onto the frosting. And I paper pieced the bottom with some more of the pink dotted paper.
I hope you all have a great weekend. Enjoy the wonderful fall weather!
stamps- Crazy for Cupcakes, Cupcake wheel
paper- White, Turquoise, dp- Marcella (K & Company)
ink- Black, Regal, Choc. Chip, Orange, Turquoise, Real Red, Galore
accessories- Coffee Shimmerz, gel pen, glitter pen, Nestabilities Double Ended Tags, ribbon, brads, pop dots
Oct 11 2008
Happy Saturday everyone! I hope the weather is as gorgeous where you are as it is here!
I just wanted to post a quick note to those of you who love the Sarah Kay images. Stampavie posted a slide show on the DT blog of the new Sarah Kay images that will be coming soon (date not yet determined). Go check them out!
Have a great day! :0)
Oct 10 2008
Today All That Scraps is having another Review Preview Friday. This week we are reviewing the Annabelle and Sadie sets. I was bummed that I didn’t get a chance to play with the Sadies but I do have an easy Annabelle project for you! I was just playing around a few days ago with the Annabelle set and I came up with this tiny box. I don’t know if anyone has made one this size before, it’s surely been done….but I haven’t seen one. So I thought I’d call it a “Micro Box”. The card it is sitting beside is a 4 1/4″ square card, which shows how tiny it is!
I already had the card made so I pulled out the same papers I used and I started figuring out my box. If you are familiar with the 2-4-6-8 boxes, this box bottom is constructed the same way….only with different measurements. And the lid is simply made as well. I didn’t have time for a complete picture tutorial, but I think you’ll find it is easy to make.
Micro Box bottom:
I started with a piece of 3″ x 5 1/2″ Celery cardstock. Score the 5 1/2″ length @ 1 1/4, 2 1/2, 3 3/4, and 5. Turn the cardstock 90 degrees and score the 3″ side @ 1 1/4. Cut on the red lines and remove the yellow shaded corner as shown below. Fold on the dotted lines and assemble the box. (Click on the thumbnail for a larger picture). Decorate as desired.
Micro Box lid:
I started with a 3 3/8″ square. But if you look closely, my lid is a little loose. You may want to try a 3 5/16″ square if you would like it to fit a bit tighter. Score @ 1″ on all 4 sides. Using the scored lines as a guide, stamp as desired. Cut on the red lines as shown below. Fold and assemble your lid. (Click on the thumbnail for a larger picture). Decorate as desired.
Have fun with the tiny box! If you make one, please link back so I can see! :0)
Here’s the deets on the card & box:
stamps- Annabelle by Cookie Crumbs
paper- Celery, Amethyst, Black, White, dp- Susan Branch
ink- Black
accessories- Nestabilities, sewing machine, Key Tag punch, gel pen, button, ribbon, Copic markers
Oct 08 2008
Yes, I know….I said I didn’t have a pic for today…well…I changed my mind. LOL. I finished up this card and thought I’d share. This is one of my favorite Rachelle Anne Miller images! It is called Hoo Hoo There! Those owls are just adorable, aren’t they?
This card was inspired by the image on the Stampavie Design Team blog. When I saw this QuicKutz Flourish die, I knew I had to use it with this image! The image was colored with Copic markers, cut out with some Oval Nestabilities and nestled into the “branches”. A pink heart was cut with a Cuttlebug die and then embossed with the Argyle folder, outlined with Stickles glitter and tucked into a corner made with one of the CB Vintage dies.
stamps- Hoo Hoo There! by Stampavie, Sugarplum Sentiment set by C.C. Designs
paper- White, Choc. Chip, Saffron, Pink Pirouette, dp- DCWV Blossoms and Butterflies
ink- Black, Choc. Chip
accessories- small oval punch, Copic markers, felt & Prima flowers, QuicKutz flourish die, brads, Cuttlebug Vintage die, Heart #1, and Argyle folder
Oct 08 2008
Sorry, I don’t have a photo to share today. But I do have a few more links to some samples of Annabelle. Check them out! :0)
Great job, ladies! :0)
Oct 07 2008
Tonight’s the night! Annabelle will be released along with the other new C.C. Designs images and Jen’s Sadie images. They will be available at All That Scraps at 10 pm EST. A chat before the release starts at 8 pm on the message board and I’d love to see you there!
Here’s another preview of Annabelle. This time I put a little feathered friend in her hand. I love how the bird looks up at her. :0) Annabelle is sporting a paper pieced Basic Grey dress. Her purse was pieced as well with a scrap of red cardstock and the pearl handle was colored with a gel pen to cover up the Basic Grey paper.
stamps- Annabelle by Cookie Crumbs
paper- white, Regal, Caribbean, Banana, Basic Grey Blush
ink- Palette Black
accessories- Oval Nestabilities, Copic markers, gel pen, Word Window punch, Primas, Doodlebug mini brads, Photo Corner punch