Category Archives: Paper Smooches

Mini Blind card tutorial with video

Today on the Splitcoaststampers website, I was asked to do a tutorial for my Mini Blind card.  You can check it out in the tutorial section of the SCS site here.  You can also see my original tutorial and card here.

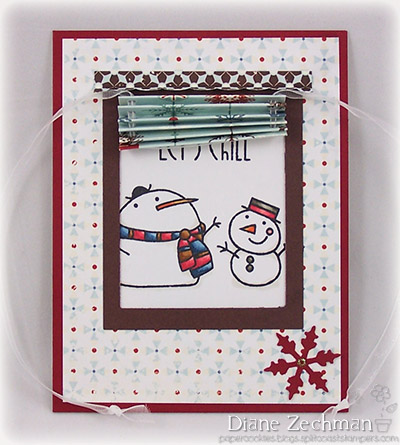
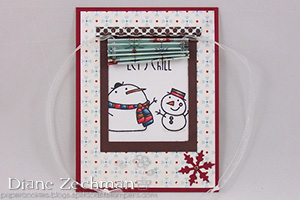
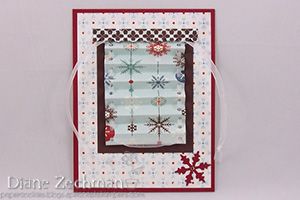
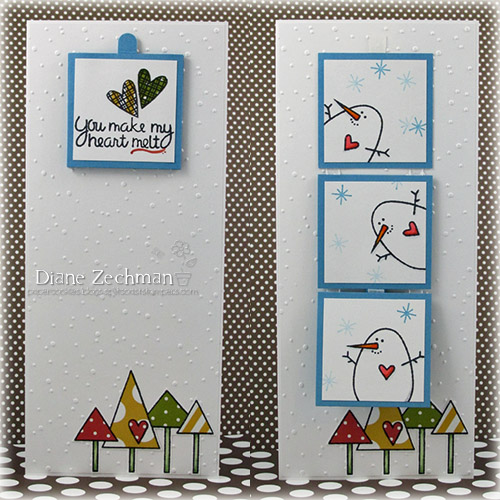
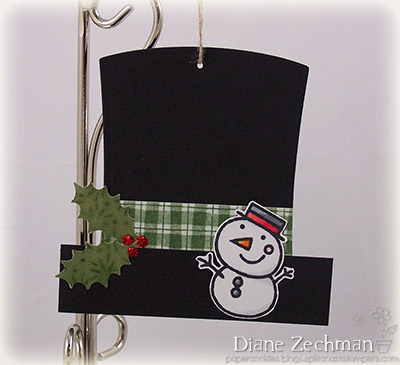
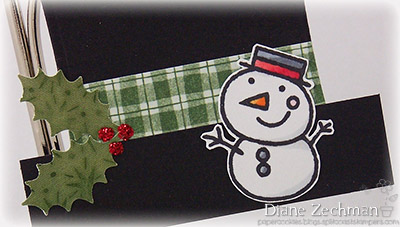
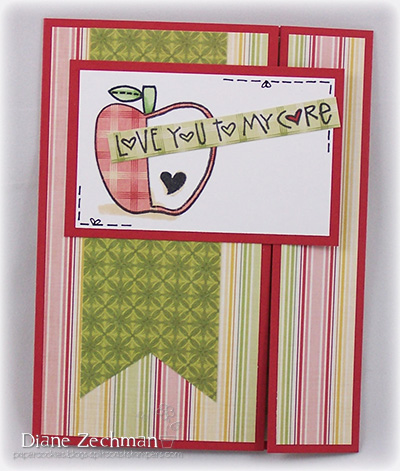
Here’s my card with the blind closed and also open.  * Video tutorial is at the end of this post.

Supplies:

card base- 5 1/2 x 8 1/2 piece of cardstock (SU! Cherry Cobbler)

layer- 4 x 5 1/4 piece of cardstock or patterned paper (Echo Park)

inside layer (optional)- 3 1/2 x 5 piece of neutral cardstock (white)

blind- 2 3/8 x 4 7/8 piece of patterned paper (Echo Park)

valance- 3/4 x 3 1/8 piece of cardstock or patterned paper (E.P.)

window frame- 3 1/2 x 4 1/2 scrap of cardstock (Choc. Chip)

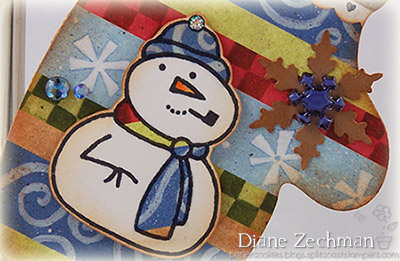
Stamps- Paper Smooches Swanky Snowdudes

Ink- Memento Tuxedo Black

Scor-Pal, Scor-Tape, glue, 18” ribbon, Crop-A-Dile, Large Rectangle Nestabilities, die cutting machine, SU! Scallop Edge punch, EK Success snowflake punch, Stickles, large-eyed needle (optional).

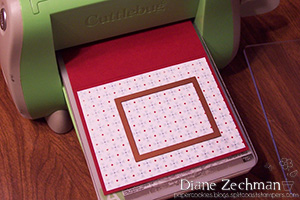
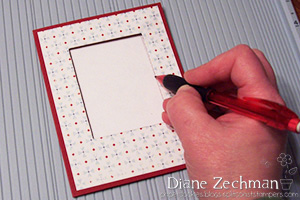
Step 1:  Adhere the layer to the cardfront. Using the next to the largest size of the Large Rectangle Nestabilities, die cut an opening in the card front only.

Hint: If you don’t have Rectangle Nestabilities, simply cut a 2 3/8 x 3 opening in the card front with a paper trimmer or craft knife.

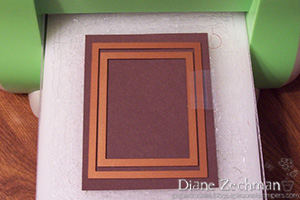
Step 2:  Using the same die, along with the largest die, diecut a piece of brown cardstock to create a window frame. Use a little tape to hold them in place if necessary. Attach this frame to the card front.

Step 3:  Score the 4 7/8″ side of the blind every 3/8″.

Hint: To do this on the Scor-Pal- first align the paper against the left fence and score @ 3/8″, 3/4″, 1 1/2″, 2 1/4″, 3″, 3 3/4″, and 4 1/2″.

Step 4:  Next, move the paper over so the left edge is aligned at the 1/8″ groove. Score @ 1 1/4″, 2″, 2 3/4″, 3 1/2″, and 4 1/4″.

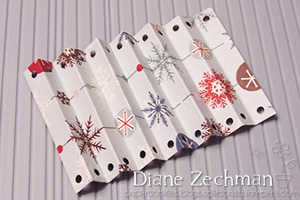
Step 5:  Starting with a valley fold at the top, accordian fold the blind. Then, holding it folded up, punch each end with the smallest hole of the Crop-A-Dile.

Step 6:  Unfold.  It should now look like this…

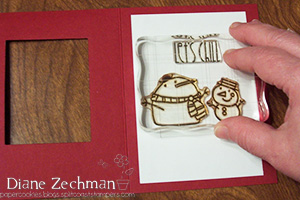
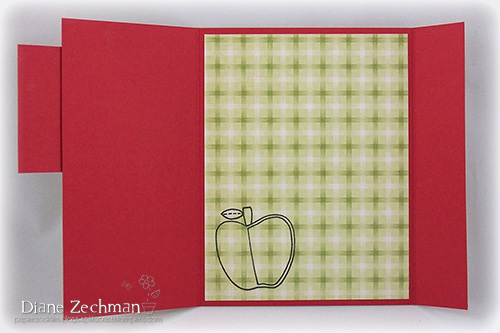
Step 7:  Lightly trace the window opening onto the inside of the card with a pencil.  Hint: If using a colored cardstock base, first adhere a neutral layer of cardstock to the inside.

Step 8:  Open the card and stamp images as desired using the pencil lines as a guide.

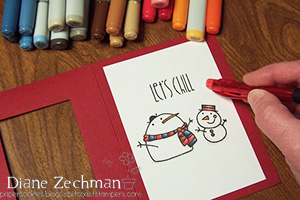
Step 9:  Color your stamped images, if needed, and erase the pencil lines.

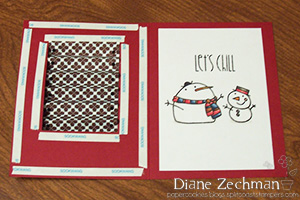
Step 10:  Attach the top section of the blind to the inside of the card front, aligning the first (top) scored line with the top of the window opening.

Step 11:  Apply Scor-Tape or glue to the inside of the card front as shown. Adhere the front to the back. (The finished card will not open like a normal card.)

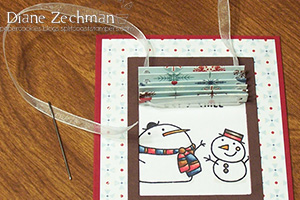
Step 12:  Thread ribbon through the holes in the blind, starting and ending at the top. A large-eyed needle may be used to thread the ribbon through if needed. Knot ends of ribbon.

Step 13:  To create a valance, score the 3/4” side at 1/4″.  Then punch the other side with a scallop edge punch.  Attach valance to the top of the window and finish card as desired.

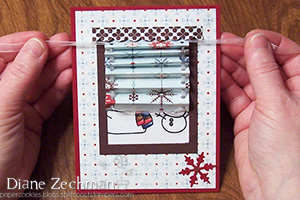
Step 14:  Pull both ribbon tails at the same time, in opposite directions, to make the blind go up.

The finished card open…

And closed…

Variation:  Try using a window die instead of the rectangle dies to create the opening.  Adjust the width of the blind as necessary.

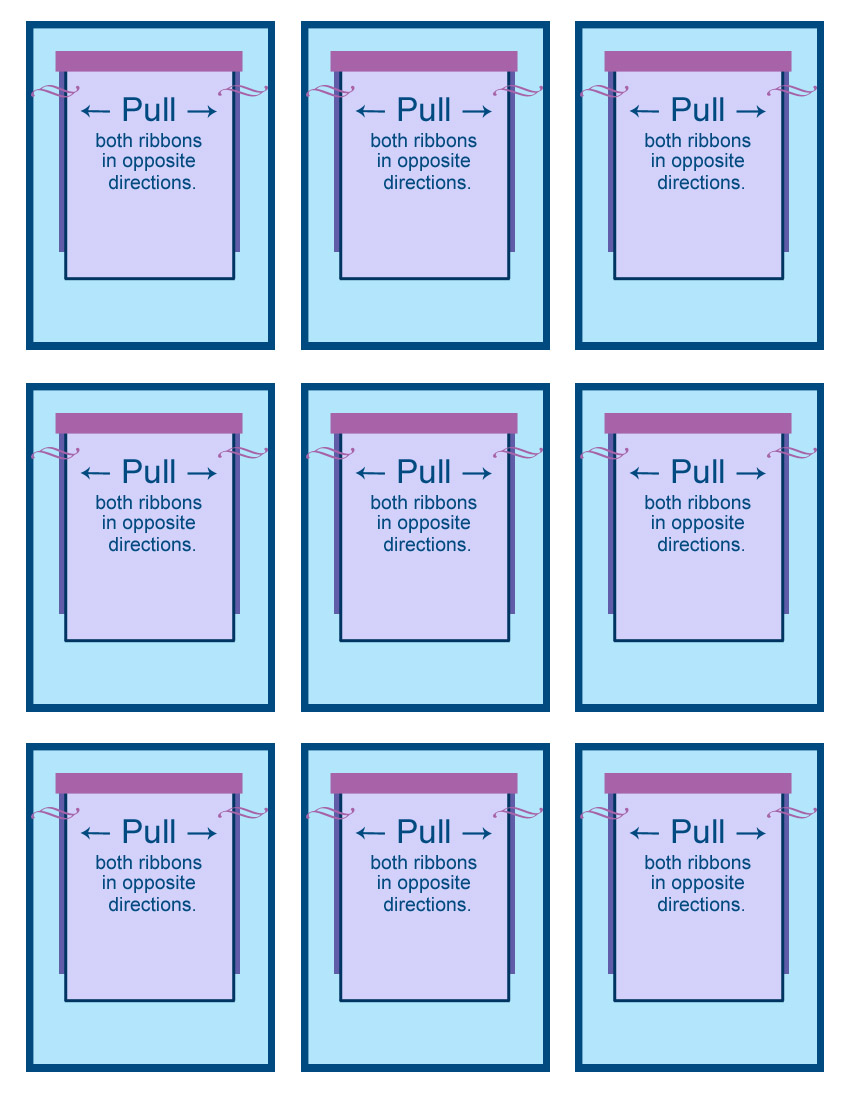
Also…sometimes we like to add a little “instructions” with our interactive cards, so I made a sheet with multiple copies.  This can be printed out and cut up so one can be included with the Mini Blind card when mailed. Click on it for a larger pic and “right click” to save to your computer.

VIDEO:  SORRY my camera cut off the end…as I was saying…the blind unfolds flat and the card will fit into a standard A2 envelope.

[youtube]https://www.youtube.com/watch?v=3YZ77hF-sB4[/youtube]

Let it SNOW-MEN!

It’s time for another Challenge Chicks Challenge and this month Jeanne chose the theme of snowmen!  Fun!  I made 2 cards to share today…the first is super easy, a CAS card, and didn’t actually have any stamping involved.

I simply hand cut a rounded top to my card base, then hand cut a nose, hat, and scarf.  I added some faux stitching and two buttons…that’s it!

For my second card, I followed this past week’s tutorial on Splitcoast for a Flip Down Stack Card.  Pictured is the card with the stack folded up and also with the stack after it flipped down.  I used the Paper Smooches Warm Hearts stamp set.  Instead of using a photo turn or magnetic closure, I used sticky-back velcro on the tab.

The hearts and trees were paper pieced.

I used the same snowman for all three frames…just stamped him in different directions…

Now go check out what the other chicks created!

  • anna wight
  • diane zechman (me)
  • jeanne streiff
  • kelli hull
  • kelly schirmer
  • lydia fiedler
  • vicki garrett
  • Want to play along?  Come join us!  Upload your snowman creations to our Challenge Chicks Facebook page or use the keyword CHXJAN13 when uploading to the SCS gallery.

    CAS card: paper- white, Simple Stories- Snap Color Vibe papers; accessories- Micron black pen, buttons, glue dots.

    Flip card: stamps- Paper Smooches Warm Hearts; paper- SU! Marina Mist, white, Simple Stories- Snap Color Vibe papers; ink- Memento Tuxedo Black, SU! Marina Mist; accessories- Kars Snowflake embossing folder, sticky-back velcro, ribbon, Scor-Tape, Copics.

    The Challenge Chicks

    Last month my friends Jeanne, Anna, and I had a little Critter Challenge…and it was so much fun that we decided to make it a monthly event!  Now we are The Challenge Chicks and a few other gals have joined us.  Fun!

    We’d love for you to play along with us!  All you need to do is follow the theme each month and post your project to our Facebook page or use the specific keyword when uploading to SCS.  Easy!  And if you play along, we have a cool badge for you to add to your blog (thanks to our talented Anna)!  Just save this one…or copy the code in my sidebar for your widget.———>

    This month I challenged The Chicks to create a Christmas tag (Use keyword CHXDEC12 on SCS).  I ended up making two tags using Tina Wenke’s Winter Collection papers, Spellbinders dies, and some Paper Smooches stamps.  First I used the Nested Mittens…

    Next I made a Frosty’s Hat tag with the Reverse Wonky Rectangles die.  Don’t know where I saw this idea but it was perfect!

    Now go check out all the other Chicks’ tags!  (and come play along!)

  • anna wight
  • diane zechman (me)
  • jeanne streiff
  • kelli hull
  • kelly schirmer
  • lydia fiedler
  • vicki garrett
  • mitten tag: stamp- Paper Smooches Swanky Snowdudes; paper- Tina Wenke’s Winter Collection, white, kraft; ink- Memento Tuxedo Black, Distress Tea Dye; accessories- Spellbinders Nested Mittens, Martha Stewart Mini Hearts punch, linen thread, ribbon, button, Copics, 1/16″ hole punch, EK Success snowflake punch, gemstones.

    hat tag: stamp- Paper Smooches Swanky Snowdudes; paper- Tina Wenke’s Winter Collection, black, white (on back); ink- Memento Tuxedo Black; accessories- Spellbinders Reverse Wonky Rectangles, linen thread, Copics, 1/16″ hole punch, Martha Stewart Holly Leaf punch, Stickles.

    baby frame

    This past weekend I attended a relative’s baby shower.  Along with the purchased gifts, I also made a framed 12 x 12 page that coordinated with her baby bedding.

    When I found out that she was using the Trend Lab Baby Barnyard bedding, I searched online and found these pics for inspiration…Then I found a pic with fabric squares that are used in the bedding…score!  I used it to make my own patterned paper.  🙂

    The papers were carefully laid out and diecut with my Big Shot Pro and the Bigz Pro Puzzle Page die.  Then I used various Paper Smooches stamp sets for all of the animals…I just think they are so cute and match pretty well to the bedding.  The barn is from an old SU! set.  I added some Judikins “straw” to the barn and popped up the cow’s nose.  The words were inspired by a scrap page title I saw…I thought they would go perfectly with the puzzle die.

    I also popped up the puppy’s feet and added the animal sound words to coordinate with the sheet in the bedding.

    This was a lot of fun to create and I hope it matches the room well since I haven’t actually seen the bedding in person.

    Thanks for stopping in and I hope this inspires you to create some wall art of your own!

    stamps- Paper Smooches- Chubby Chums, Alphadot, Green Acres, and Party Posse, SU! On The Farm; paper- Creamy Caramel, Gable Green, Bashful Blue, white, kraft; ink- Memento Tuxedo Black, SU! Gable Green, Creamy Caramel, Bashful Blue, Brown Marvy LePen; accessories- Sizzix Bigz Pro Puzzle Page die, Copics, ribbon, Magnolia Romantic Tag and Lovely Fence dies, dimensionals, buttons, Judikins Straw Speckles, SU! flower brad, C.C. Designs grass border die, MFT Wonky Scallop Border die, PTI Cloud dies, SU! Oval punch, Cuttlebug Red Tag Sale dies, heart punch, computer font- PeggyFont.

    hi…hello…

    Today I have a card that I made to play along with the Paper Smooches Trend Watch Challenge.  The challenge this week is to use typography…check out the inspiration pic and details here.

    I put sentiments from 4 different stamp sets together to basically say “hello”.  Fun challenge!  Click here if you want to play along…

    Thanks for popping in…have a great weekend!

    stamps- Paper Smooches Sugar Rush, Hang Ups, Friendly Flowers, and Swanky Snowdudes; paper- So Saffron, MME Stella and Rose- Hattie; ink- Memento Tuxedo Black; accessories- pop dot, Stickles.

    hey chickie

    During Hurricane Sandy there wasn’t a whole lot to do while waiting out the wind and rain.  I grabbed a hot cup of tea, some Paper Smooches stamps, and watched a movie with my family.  Then the power went out.  ugh.  My heart goes out to everyone affected by this terrible storm.

    Playing along with the current Sparks Challenge, here’s what I came up with.

    The PS stamps are just so fun to paper piece…I have a hard time not piecing them!  ;^)

    Click on the banner below to find the inspiration photo and info to play along.

    stamps- Paper Smooches Chubby Chums, Hang Ups, and Friendly Flowers; paper- MME Stella and Rose- Hattie, MME Moments, Black, white; ink- Memento Tuxedo Black.

    a reindeer tag

    Just popping in quick before the hurricane comes through.  Stay safe, everyone!

    Here’s my October Christmas cards for the Dirty Dozen & Alumni Christmas Card Challenge.  Stacy challenged us to make tags this month and I chose to put my tags on a card so I could build up my Christmas Card stash.

    I had these done about a week ago but I was preparing for company and Hurricane Sandy so I’m just now getting them up.  I used another Paper Smooches image…love that reindeer!  I also used a reindeer embossing folder that I found on my last visit to Buffalo Stamps.

    Keeping it short…going to cook dinner before we lose power!

    stamps- Paper Smooches Swanky Snowdudes and Santa Paws; paper- Kraft, white, Blue Bayou; ink- Memento Tuxedo Black, Distress Tea Dye; accessories- SU! Bigz Two Tags die, Copics, corner rounder, Cart-Us Reindeer embossing folder, May Arts ribbon, linen thread, Stickles, Gelly Roll Stardust pen.

    Millie Mousie

    This past weekend I was asked to make a thank you card for a nursing instructor.  With little time to make one, I knew it had to be a CAS card.  I’ve also been wanting to use this cute Inky Antics set that I got from my friend, Tracy.  With a little coloring and stamping on kraft cardstock, I was able to pull off a quick & easy card.

    Look ma…no layers!  I did pop up the nursing cap though.  The “thanks” was done with the Paper Smooches alphabet called Alphadot.  Then I just drew some lines to tie the mouse and sentiment together.  This would be great with a get well sentiment too.  I might just have to make a few more.  :^)

    stamps- Inky Antics- Millie Mousie, Paper Smooches- Alphadot; paper- kraft, white; ink- Memento Tuxedo Black, SU! Ruby Red marker; accessories- Copics, dimensional.

    Halloween hangout

    Happy Wednesday!  Today I have a Halloween card that I made for the Paper Smooches Sparks Challenge.  This was easy…the PS stamps are so fun to play with!  It was a color challenge but I was also inspired by the circles and black background.  Here’s my card.

    I wanted this card to be a bit slimmer.  The finished size is 3 1/2 x 5 1/2.  I just cut one side down a bit and it still fits a regular A2 envelope.

    Click on the banner below to see the challenge colors and play along…

    Thanks for stopping by…have a great day!

    stamps- Paper Smooches- Falling For You, Chubby Chums, and Hang Ups; paper- So Saffron, Gable Green, Black, Lavendar Lace, Peach Parfait; ink- Memento Tuxedo Black; accessories- 1 1/2″ circle punch, baker’s twine.

    to my core

    Hello!  It is a chilly fall day here today.  A perfect day to share a card with an apple, I think.  Yes, I finally stamped.  :0)  This card is playing along in the Paper Smooches Sparks Challenge.  I ♥ my Paper Smooches stamps…I really need to get some more!

    When I look at the inspiration picture, I think of the beautiful fall leaves (which are turning here right now!) and the apples that are ripe for picking.  So here’s what I came up with…

    This is an Offset Gatefold card…so easy to make with a Scor-Pal.  Just start with a normal 5 1/2 x 8 1/2 inch piece of cardstock.  Score the 8 1/2 inch side @ 1 1/4 and 5 1/2.  Fold.

    My striped paper layers measure 2 3/4 x 5 1/4 and 1 x 5 1/4.  The banner is 1 3/4 x 4 3/4 with a notch cut in the bottom.  The apple was paper pieced, which is so fun to do with the PS stamps.  The image layer is only attached to the left flap.

    Here’s a pic of the inside.

    Have a great day and thanks for popping in!

    stamps- Paper Smooches- Falling For You; paper- Riding Hood Red, white, Cosmo Cricket- Tea For Two; ink- Memento Tuxedo Black, Micron Black pen; accessories- Scor-Pal, Copic markers.