Category Archives: name frames, framed art

name frame gift

Before I get to the project I’m sharing today I want to let you know that July 11 will be my first blogiversary!  Wow- it hardly seems that a year has gone by already!  So keep any eye out in the coming days for some blog candy to celebrate.  😉

pase-name-frame-diane-zechman.jpg
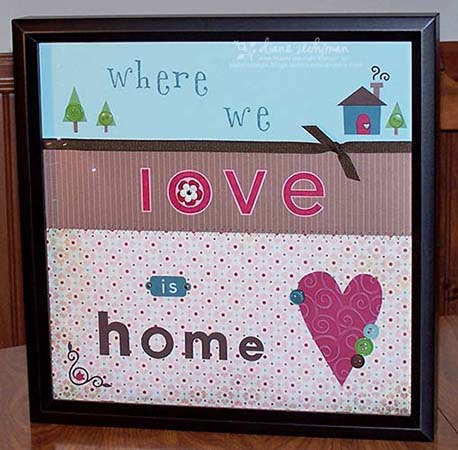
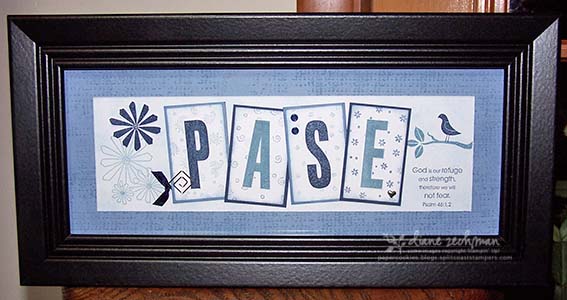
I made this name frame a little over a week ago for some friends who are moving away.  They and another family came for dinner one night to say goodbye.  We had such fun!  Anyway, I was inspired by the frames that Jenn (sarsam) did and created this one for them.  I purchased the frame at Walmart.  Our friend found a nest of baby birds that fell during a recent storm and he has been watching over them but only one baby survived.  So I decided to include the bird and branch along with a bible verse.  These name frames are fun to create- thanks Jenn for the little nudge I needed to make them!   

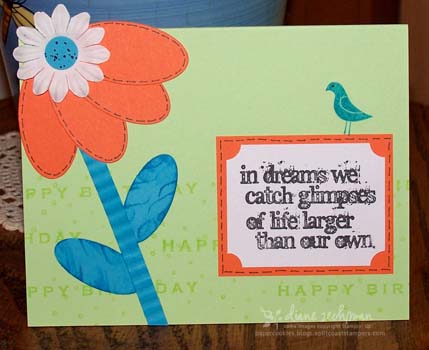
stamps- Rough Texture wheel, Headline alpha, Fresh Fillers, Spring Solitude, Refuge & Strength

paper- non SU!

ink- Brocade, Navy

accessories- eyelets, ribbon, heart brad, square spiral clip

fun time stampin!

welcome-frame-diane-zechman.jpg

Before I start yakking about the pics here, don’t forget to check out the new C.C. Designs releases today over at All That Scraps!  

Here are a few of the projects we did when some of my friends came to stamp.  I will let them upload their own shoebox projects but I will share what Jenn brought for us to make since her sample was different than the ones we created.  Jenn brought frames and supplies for us to each make a name frame!  How cool was that?  🙂   Karen went first to make Jenn’s project and since we all decided to do the word “welcome”, we pretty much cased hers.  LOL.  Hey, she did a great job!  We just changed a few things to make them our own.  We used various background stamps and the Headline Alpha to make these.   

 albtm-peek-a-boo-dmz.jpgI bet you couldn’t guess that this was my shoebox.  LOL.  You’re probably getting tired of seeing these Peek-A-Boo cards.  I guess I need to move on…hehe.  They are just so much fun!  I used the A Little Birdie Told Me set and Bali Breeze paper.  In case you missed my earlier posts, here’s one with a link to directions.  And below is a pic of the card when opened.  This set is perfect for this type of card since it has words that can be used on both the front & inside of the card.

albtm-peek-a-boo-2-dmz.jpg

Below is a progressive card we designed together, in a round robin way.  Jenn went first, making the background of words.  Then Karen made the flower with the oval punch and Primas.  They were passed around the table and each person added something.  Karen had these great words from Stampers Anonymous.  I also liked the way Judy added black speckles to the flower center and punched the corners on the sentiment!

progressive-flower-diane-zechman.jpg

We also used my Cuttlebug Swiss Dots folder and Rose Frame die, along with Pomegranate ribbon to make these cards.  They were all just a slight bit different.  Mine has the eyelets at the bottom but I still didn’t like the placement of the ribbon, so I have since slid it down a bit on the card.  Thanks again ladies for a fun day!

rose-frame-diane-zechman.jpg

clipboard frame

Just a quick post to share my 3-D swap project.  I still have a lot to put away and catch up on here so this will be short.  clipboard-3d-swap-diane-zechman.jpg  I found these 4 x 6 1/4 wood clipboard frames at ACMoore.  I painted the backs and sides of them and covered the fronts with Ginger Blossom paper which was applied with Mod Podge.  They were pretty easy to paint & cover since all the hardware is removable with screws.  After they were completely dry, the words were stamped with Stazon and ribbon was attached with Red line tape.  The butterfly was stamped onto the scalloped circle and again onto white cardstock.  The wings were watercolored and cut from the white, then attached onto the green piece.  I applied a light coat of Mod Podge over the circle to help protect it.  You have to be careful to avoid smearing the ink.  When the circle was dry, it was stuck onto the ribbon with Red line tape so that a photo can be tucked underneath.  Some Stickles was applied to make it sparkly.

stamps- Time Well Spent

paper- Ginger Blossom dp, River Rock, White

ink- Stazon Black, Guava, Ruby, Cameo

accessories- scallop punch, Guava ribbon, red line tape, Mod Podge, Stickles

Take Ten toot

Woohoo! I received the Spring issue of the Take Ten magazine today and I have a 2 page spread on pages 68-69. Check it out! 🙂 It has been a few years since I submitted anything to a magazine, so this was a bit exciting. I was contacted about 6 months ago and asked to make some of my coaster clipboards. What an honor! Now that I am permitted to share, here’s a pic of the clipboards I made. The clips have magnets on the back and I thought they would be great hanging on a frig with some favorite pics!
Edit to answer some questions: I found the magnetic clips at my local Dollar Tree.

coaster-clipboard-frames-9-07-dmz.jpg

stamps- It’s All Good, EFP, Whimsy Jumbo wheel
paper- Celery, Choc. Chip, Sahara Sand, Bashful, Olive, Lilac, Saffron, Glossy White, dp by EKSuccess
ink- Choc. Chip, Celery, Saffron, Craft White
accessories- chipboard coasters, magnetic clips, Photo Corners punch, Three For You flower punch, silver brads, Crop-A-Dile, 1 1/4 circle & 1 1/8 square punches, ribbon

12 x 12 framed art

I had so much fun with this project! Sorry about the bits of glare under the trees….it is difficult to get a good pic with glass. I made this 12 x 12 artwork this week for an “anything but a card” challenge we are having today. Then I inserted it in a scrapbook page frame. I was really pleased with how it turned out. I saw the words in a book somewhere with a much simpler layout. It only contained black letters and a heart made of buttons on a plain sheet of cardstock. I wanted to dress mine up a bit, though, and create some added interest to the page.

12×12-valentine-frame-dmz.jpg

I started with half a sheet each of Soft Sky cardstock and the Basic Grey Blush dp. Then I added a strip of Close to Cocoa dp and finished the edges with ribbon and zigzag stitches on my sewing machine. I drew a heart for a pattern and cut it from Pomegranate cardstock, then embossed it in my Cuttlebug. The words “where, we, and love” are stamped and the word “is” was a rub-on. All of the remaining letters and pieces were cut with various Cuttlebug dies. Some Primas, brads and buttons finished off the project. I think my favorite parts are the buttons on the trees and the heart shaped brad on the door. 🙂 I hope you’ve enjoyed seeing this project as much as I have enjoyed creating it!

stamps- Big Deal Alphabet, Whimsical Alpha Lower
paper- Soft Sky, Pomegranate, Pretty in Pink, Cocoa, Choc. Chip, Bayou, Wasabi, Cocoa dp, Basic Grey Blush dp
ink- Pomegranate, Bayou, white craft (to highlight the heart)
accessories- Cuttlebug dies- Winter, Vintage, Red Tag Sale, Tiny Tags, and D’Vine Swirl embossing folder, buttons, ribbon, sewing machine, Primas, brads, MM Rub-On alphabet