Category Archives: ATC’s and Calling Cards

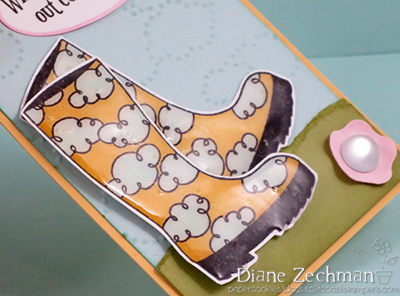
spring boots ATC

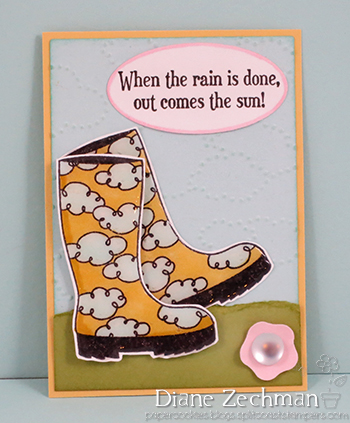
I was in an ATC swap with some friends that followed a spring theme.  We were working on putting together an ATC frame similar to this one that I made… but with spring images.  A few colors were chosen that we all would work with and here’s the ATC I created.

spring boots ATC diane zechman

I added Crystal Lacquer to the boots…

spring boots ATC 2 diane zechman

I would gladly trade snow boots for cute spring boots, wouldn’t you?

stamps- SU! Bootiful Occasions; paper- SU! Soft Sky, So Saffron, Pear Pizzazz, Pink Pirouette, white; ink- Memento Tuxedo Black, SU! Pear Pizzazz and Coastal Cabana for light sponging; accessories- Copics, SU! Clouds embossing folder, Crystal Lacquer, adhesive rhinestones, EK Success flower punch, foan dots, SU! Oval punch.

winter ATC frame

Hello friends!  I have a special project to share today that I made for a Christmas gift.  I wanted the recipient to be able to enjoy it all winter long, though, so I went with a snowy/winter theme.  Each little card in my frame is ATC size (2 1/2 x 3 1/2 inches) and I used lots of my favorite Sweet ‘n Sassy stamps and dies.

I also made this for our Challenge Chicks Challenge…this month Anna wants us to create winter scenes!
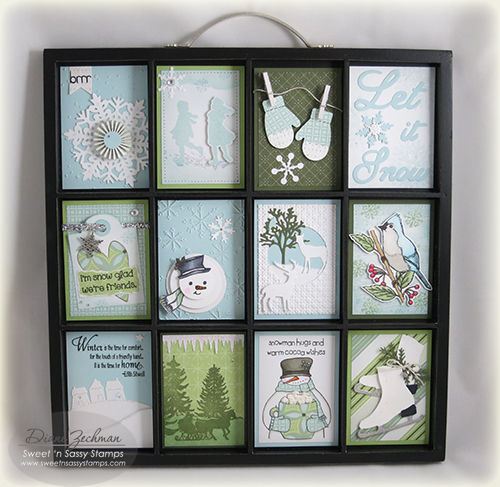
SNSS ATC frame diane zechman

I wanted to be able to switch out the ATC’s for each season/holiday or whatever theme I want…so they were attached in the frame with Removable Glue Dots.  I found these to work perfectly for the right amount of adhesion needed, yet still be able to be easily removed.

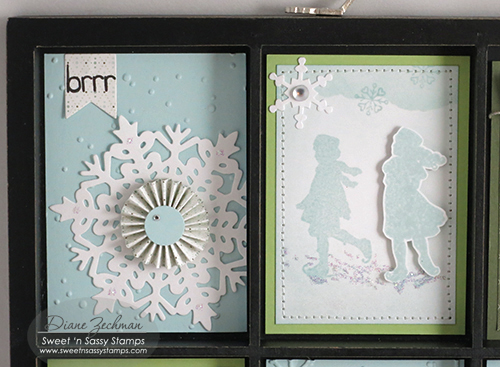
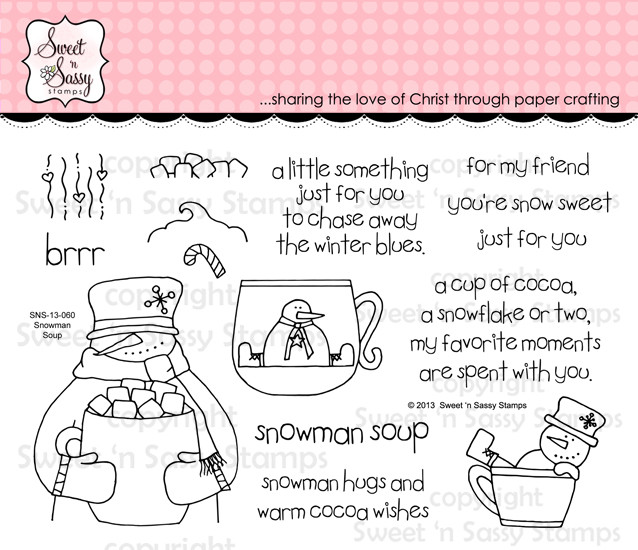
Here’s some close-ups of each ATC.  For the first one I made a rosette with my Scor-Pal and centered it onto a Sweet ‘n Sassy Large Snowflake diecut.  The “brrr” is from my Snowman Soup stamp set and the background was embossed with the Cuttlebug Kars Snowflake embossing folder.

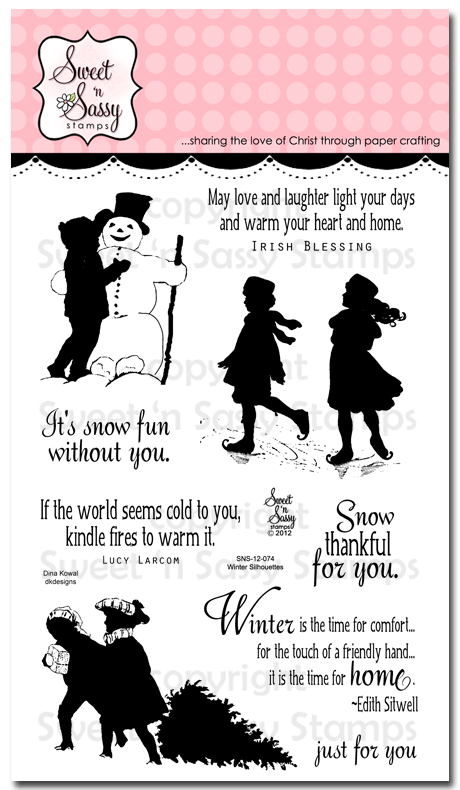
The second one has some stamped skating friends from the SNSS Winter Silhouettes stamp set, with one popped up for dimension.  There’s a few tiny snowflakes from my Snowy Hello stamp set lightly added to the top.  The edges of this one were stitched on my sewing machine.
SNSS ATC frame 2 diane zechman

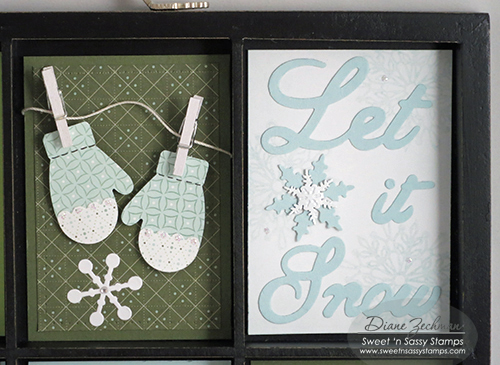
The mittens were made with a SU! punch and the white tiny clothespins came from Michael’s.  They were attached with 1/8″ Scor-TapeCrochet thread was perfect for the string.

The Let it Snow words are a Sizzix die and I faintly stamped snowflakes in the background from the Spectacular Snowflakes.
SNSS ATC frame 3 diane zechman

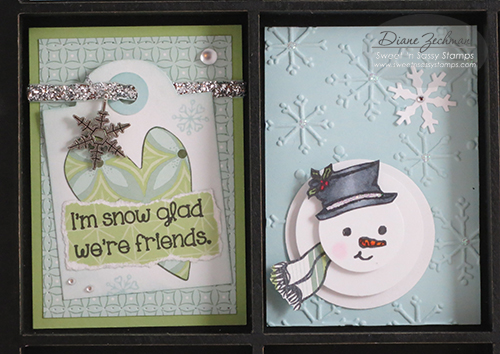
On the left, below, I used one of the Bookmarks & More dies to create a tag. The heart was cut from the Heart dies and the tiny snowflakes and words are from my Snowy Hello set.  The snowflake charm is SU!

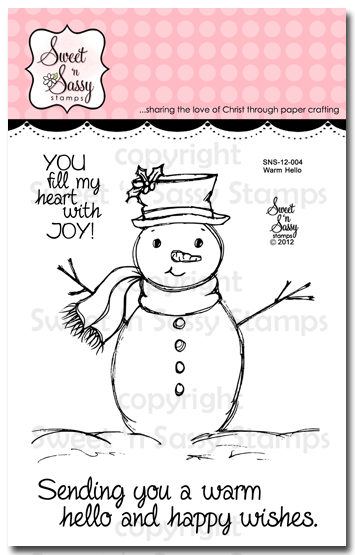
On the right the background was embossed with the Sizzix Snowflakes #3 folder.  3 circles were punched and popped for dimension.  The snowman’s face, hat and scarf are from the Warm Hello stamps.
SNSS ATC frame 4 diane zechman

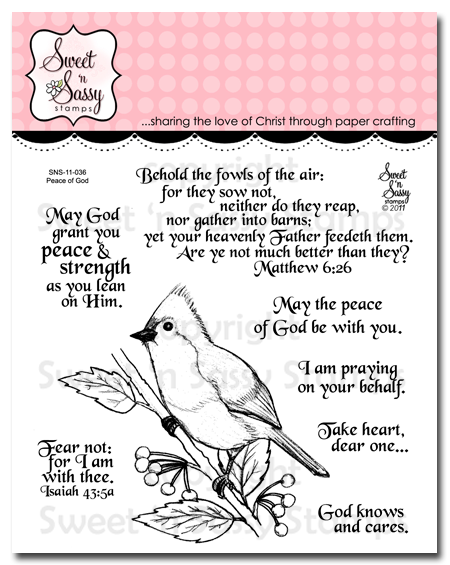
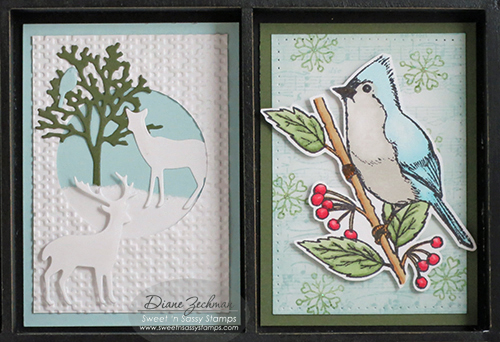
The tree, deer, and bird, below are from Forest Silhouettes dies. On the right, I lightly stamped the Music Background.  More Snowy Hello flakes were stamped (this time in green) and the bird from Peace of God was popped up.
SNSS ATC frame 5 diane zechman

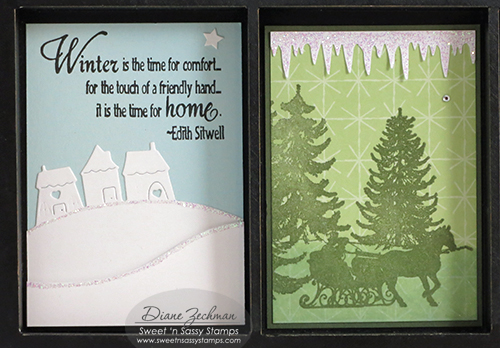
The Hillside Edges dies made a cute snowy scene and the words from Winter Silhouettes went with it perfectly.  Then I stamped the sleigh ride image from one of my fave Christmas sets, Old Fashioned Christmas.  The top border was punched with the Martha Stewart Icicles punch.
SNSS ATC frame 6 diane zechman

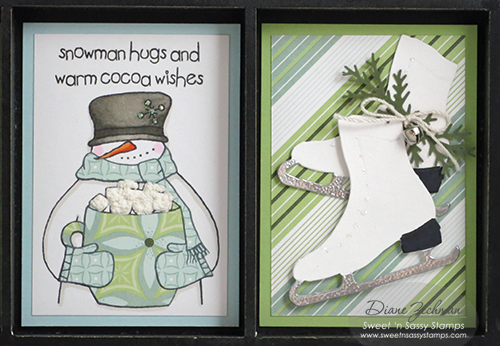
The words and snowy fella below, drinking hot cocoa, is from my Snowman Soup set.  The mug, scarf, and mittens were paper pieced.  Then I applied a Puffy Velvet Fabric marker (like Liquid Applique) to the marshmallows and heat them with a heat tool to puff them up.

The skates are a Sizzix Movers & Shapers die.  The blades were heat embossed with silver e.p. and the Martha Stewart branch punch, along with a tiny jingle bell, finished them off.  You can’t see in the pic but the skates were painted with Picket Fence Crackle Paint.
SNSS ATC frame 7 diane zechman

Lots of glitter and bling were added to each one to make this frame sparkle!  My ATC memory tray was purchased at Hobby Lobby.

Please join us and create a card with a winter scene… then share it on our Facebook page!  Also, you can upload it to the Splitcoast gallery…and use the keyword CHXJAN15.  Now be sure to click on the links below to check out what the other Chicks created!
challenge chicks logo small

stamps- Sweet ‘n Sassy Snowman Soup, Winter Silhouettes, Old Fashioned Christmas, Warm Hello, Peace of God, Music Background, Snowy Hello, and Spectacular Snowflakes;

paper- white, SU! Soft Sky, Certainly Celery, and Always Artichoke, SU! Wintergreen dsp;

ink- Memento Tuxedo Black, Versafine Black, Versamark, SU! Soft Sky and Always Artichoke;

accessories- Sweet ‘n Sassy dies (Large Snowflakes, Forest Silhouettes, Hillside Edges, Bookmarks & More, and Hearts), Scor-Pal, Scor-Tape, Cuttlebug Kars Snowflakes emb. folder, circle punches, hot glue gun, tracing wheel, sewing machine, Stickles, rhinestones, foam dots, Wink of Stella clear, Cuttlebug Snowflakes #2 die, Martha Stewart Icicles punch, SU! Square Lattice emb. folder, SU! mitten punch, SU! snowflake charm, Copic markers, Sizzix Snowflakes #3 emb. folder, ribbon, crochet thread, mini clothespins, Sizzix Let it Snow #2, Sizzix Movers & Shapers ice skate die, Puffy Velvet Fabric marker, Ranger Picket Fence Crackle Paint, silver embossing powder, tiny jingle bell, Martha Stewart branch punch.

Here are the Sweet ‘n Sassy products that I used…
 

an ATC Swing Card

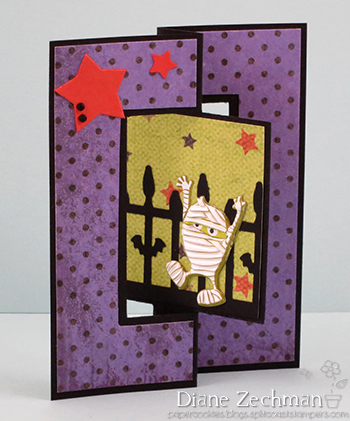
On Tuesday I shared one of my ATC swaps, a tiny Pop Up Box Card.  Today I have the other ATC I made…a mini Swing Card.  I started with some cute dimensional mummy stickers from Michael’s and created my card around them.

boo to you ATC 1 diane zechman

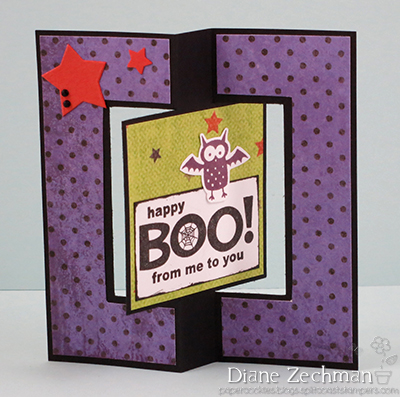
I used the SU! Monster Munchies set on the back of the swinging panel.

boo to you ATC 2 diane zechman

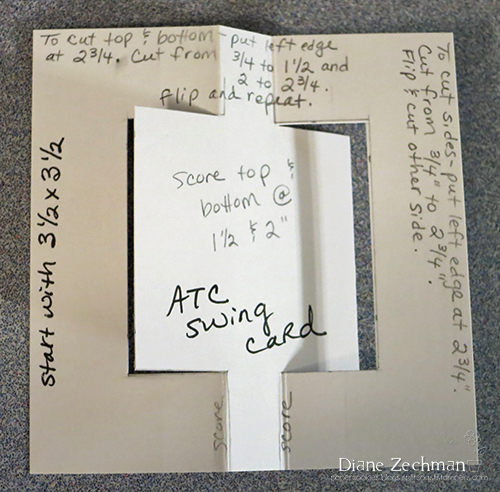
I sketched and cut my template onto some scrap cardstock and scribbled a few measurements so I wouldn’t forget.  😉  Here’s a quick pic of the template I made and I’ll type the directions below.

ATC Swing Card

First you need to start with a 3 1/2″ x 3 1/2″ square of cardstock.

To make the top and bottom cuts:  Place the left edge of one side at the 2 3/4″ mark on your paper trimmer (a guillotine style will not work here).  Cut from the 3/4″ mark on the blade guide to the 1 1/2″ mark.  Lift the blade slightly (do not move the paper) and skip a small section…now lower the cutting blade and cut from the 2″ mark to the 2 3/4″ mark.  Flip the cardstock 180 degrees and repeat.

Now turn the cardstock 90 degrees.

To make the side cuts:  Place the left edge at 2 3/4″.  Lower the blade and cut from the 3/4″ mark to the 2 3/4″ mark. Flip the cardstock 180 degrees and repeat.

Now score the top and bottom with the scoring blade or a Scor-Pal @ 1 1/2″ and 2″ (do not score through the middle).

Decorate as desired!

stamps- SU! Monster Munchies; paper- black, SU! Dusty Durango, K&Company KP Halloween, MME- Boo To You; ink- Versafine Black, Colorbox Stephanie Barnard- Plum; accessories- Martha Stewart Iron Fence punch, Recollections Dimensional Stickers, Scor-Pal, star punch, Cuttlebug Star die, rhinestones.

Pop Up Box Card (ATC size)

A few weeks ago I participated in an ATC swap (artist trading card) and made 2 different ATC’s with fancy cuts and folds.  My Scor-Pal and Scor-Tape, which I couldn’t do without, came in very handy!  (Have you seen the new Scor-Pal Eighths? Check out the pics below!)  Here’s my first ATC from this swap…be sure to check back for the other one.

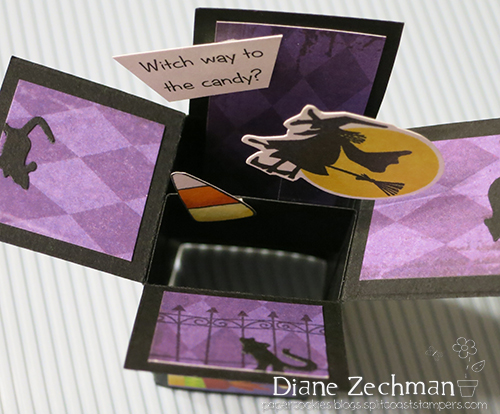
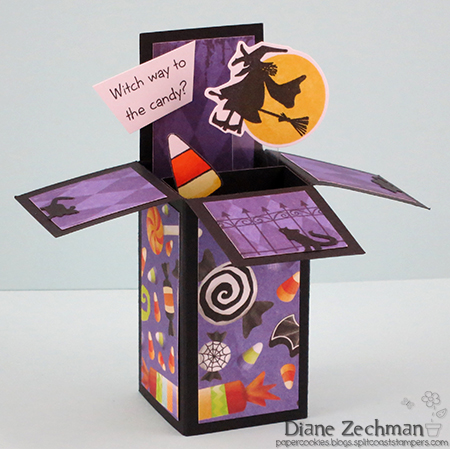
Witch way to the candy?

witch way ATC diane zechman

When the box folds flat, it measures 2 1/2″ x 3 1/2″, ATC size.  Note: This is an adaptation of the Pop Up Box card.

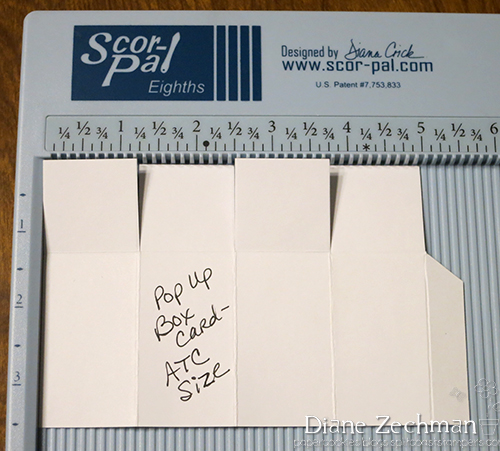
For the ATC box card base you will need 2 pieces of cardstock: one piece measuring 3 1/2″ x 5 1/2″ and one 3/4″ x 2 1/2″ strip.  *To easily cut these without waste, start with a quarter sheet of cardstock- 4 1/4 x 5 1/2.  Cut this down to 3 1/2 x 5 1/2.  Then cut the remaining strip to the 3/4 x 2 1/2 size needed.

Using your Scor-Pal, score the long side of the 3 1/2 x 5 1/2 piece @ 1 1/4, 2 1/2, 3 3/4, and 5″.  Turn it counter-clockwise 1/4 turn and score again @ 1 1/4″.  Crease the folds and cut the top flaps down to the 1 1/4″ scored line as shown below.  Remove the top section of the 1/2″ flap, angling the cut as shown.

witch way ATC 2 diane zechman

Add Scor-Tape to the remaining 1/2″ flap, fold and adhere box.

Next score each end of the small strip @ 5/8″. (Or score @ 5/8″ and 1 7/8″)

witch way ATC 3 diane zechman

Crease the folds and adhere each flap inside the top of the box card.  This piece is what you will adhere your images, etc. to.  See the finished box for placement…
witch way ATC 4 diane zechman

The patterned paper layers to finish the ATC card will be the following sizes… 1″ square, 1 x 2, and 1 x 3 1/4 (for the inside of the back).

Now…witch way to the candy?  🙂

stamps- SU! Home Is Where The Haunt Is, candy corn- $1 stamp from ?, words- computer; paper- black, white, K&Company- KP Halloween; ink- Memento Tuxedo Black, Versafine Black, SU! Daffodil Delight; accessories- Scor-Pal, Scor-Tape, Copics, foam dots, 10 mil clear acetate, Martha Stewart Mice punch.


Oct. 31 ATC

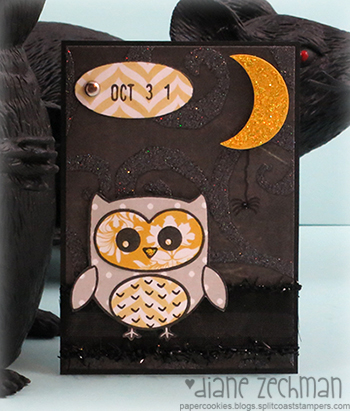
It’s time for another Challenge Chicks Challenge!  This month Kelli challenged us to make a Halloween card…but without using any orange, purple, or green!  I immediately thought, “Is she crazy or what?”  LOL.  But then I realized that I could still use black, gray and yellow.  whew.

I am in a little ATC swap with friends so here’s my Oct. 31 ATC…(which also goes with this month’s Ribbon Carousel theme…be sure to play along for a chance to win a carousel!)

I started with a swirly background which is really sparkly (hard to see that).  Then I added some sparkly ribbon.  The cute owl was paper pieced (one of my fave techniques) and is from the Sweet ‘n Sassy Bookmark Bits & Pieces stamp set.  The moon was cut with a 1″ circle punch and the tag is from the Sweet ‘n Sassy Mini Tags dies.  Oct. 31 was masked and stamped with the SU! date stamp.

The moon and owl were popped up with foam tape.  Stickles was applied to the moon and the owl’s beak.  If you look closely, I drew a black line from the moon and “hung” a tiny hand drawn spider.  His body is a teeny dot of Black Stickles.

Want to play along?  Join us in creating a Halloween card and share it on our Facebook page!  Now be sure to click on the links below to check out what the other Chicks created!

  • anna wight
  • diane zechman (me)
  • jeanne streiff
  • kelli hull
  • kelly schirmer
  • lydia fiedler
  • stamps- Sweet ‘n Sassy Bookmark Bits & Pieces, SU! date stamp; paper- K&Company KP Halloween, MME Breeze, black, Daffodil Delight; ink- Versafine Black; accessories- Sweet ‘n Sassy Mini Tags dies, Halloween ribbon (Michael’s), foam tape, Scor-Tape, 1″ circle punch, brads, Stickles.

    play ATC

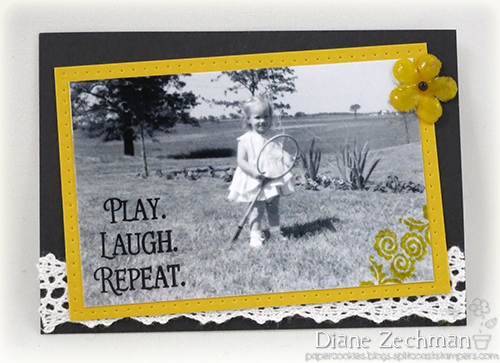
    This weekend I am in an ATC (artist trading card) swap with some friends.  I wasn’t sure what I was going to create (there isn’t a theme) except I knew that I wanted to dig out my long-neglected melting pot and use it somehow.  I settled on dipping some Prima flowers.  Then I pulled out a photo of myself when I was very young and scanned/cropped/printed them out onto photo paper.  I went with a black and yellow color combo and came up with this…

    After the flowers were dipped in the UTEE, I added a tiny half pearl that was colored with a black Sharpie.  (The Stay Put Craft Mat is wonderful to work on when using hot UTEE!)  The words are from the Sweet ‘n Sassy set called His Child and the yellow flowers stamped across the corner of the photo are from the SNSS Decorative Frame Toppers.

    Have a great Wednesday!  School is out here now so I’m enjoying a quiet morning!  :0)

    stamps- Sweet ‘n Sassy- His Child and Decorative Frame Toppers; paper- Glossy Photo Paper, black, SU! Crushed Curry; ink- Memento Tuxedo Black, SU! Crushed Curry, Black Sharpie marker; accessories- Scor-Tape, Stay Put Craft Mat, Melting Pot, UTEE, May Arts lace, printer, Prima flower, tracing wheel, adhesive pearl.

    RIP Ima Goner

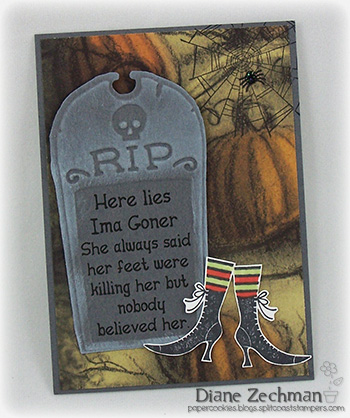
    Hello!  It feels great to get back in the swing of things.  I’m still cleaning up after the wedding but it’s fun to be stamping again!  My friends, the Gigglers, and I traded some ATC’s recently (most of them were Halloween)…how fun?!  Here’s mine…

    The tombstone is an old Cuttlebug die.  I typed the words and printed them on gray cardstock.  Then I *very carefully* diecut them so the words would fit into the empty space after embossing.  Let’s just say that part wasn’t so fun.  lol.

    I thought the witch’s feet from Wicked Cool would fit the words.  I also stamped the spiderweb, drew his legs, and used black Stickles for his body.

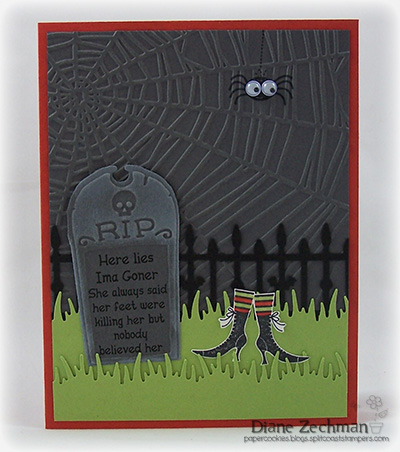
    I had some extra pieces so I also made a card. (Yes, I was crazy enough to diecut extra tombstones!)  I used the Cuttlebug Spiderweb embossing folder, a spider from Googly Ghouls and some googly eyes on this one.

    Have a great night!

    ATC: stamps- Wicked Cool; paper- Basic Grey, Moxie- Midnight Dreary; ink- Memento Tuxedo Black, Dusty Durango, Certainly Celery; accessories- Cuttlebug RIP, Stickles, dimensionals.

    card: stamps- Wicked Cool, Googly Ghouls; paper- Basic Grey, Dusty Durango, white, Certainly Celery, Black; ink- Memento Tuxedo Black, Dusty Durango, Certainly Celery, craft white; accessories- Cuttlebug RIP and Spiderweb, Martha Stewart Iron Fence and Grass, dimensionals, googly eyes.

    a slider ATC

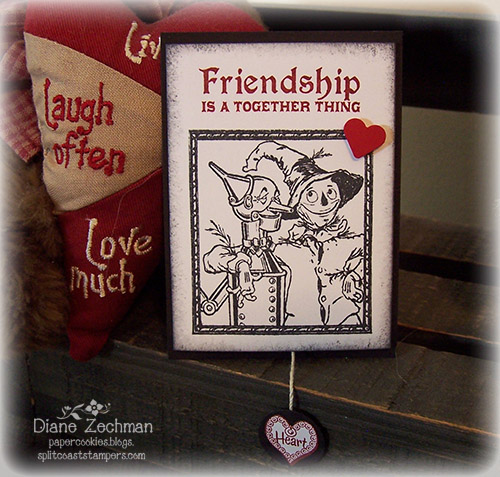
    One of the swaps I joined at our stamping event on Saturday was an ATC (artist trading card) swap.  I was inspired by a friend who made a miniature Slider Card about 6 years or so ago.  I’ve always loved it and wanted to try one myself.  Since I couldn’t tear it apart without ruining it, I had to figure out some of the measurements.  These can look difficult but don’t let it intimidate you…once you make one, you’ll see that it’s really not hard.  The Scor-Pal and Scor-Tape are very helpful!

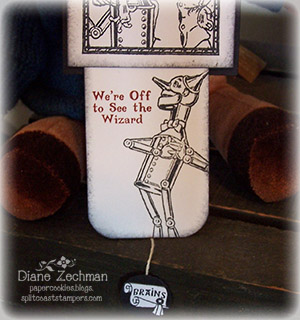
    To go along with our theme, I used the Crafty Secrets Wizard of Oz stamp set.

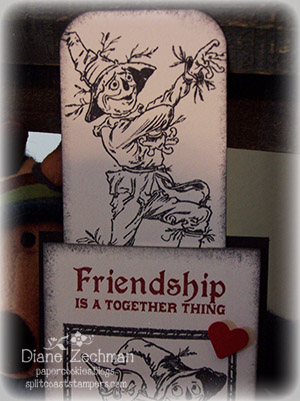
    The bottom has a string to pull with 2 small punched circles.  On one side I stamped, cut out, and attached the tin man’s “heart”.  On the other side I attached the scarecrow’s “brain” (diploma).  When the string is pulled, two pieces of cardstock slide out from the top and bottom openings.

    Here’s some close-ups…

    (Sorry for the bad photos… DH was using the table that holds my light tent to attach his string jig to make a new bow string (archery).)

    The directions for making a Slider Card can be found here on Splitcoast.  The key mechanism to making this work is a strip of plastic shopping bag that is carefully added to the inside.  Below I will list the measurements for both the A2 (normal size card) and the ATC (shown here) so you can compare them to the tutorial on SCS and cut everything correctly.

    Slider Card Measurements:

    strip of plastic shopping bag:  A2- 1 x 11 , ATC- 1 x 8

    base:  A2- 4 1/4 x 5 1/2 , ATC- 2 1/2 x 3 1/2

    slider frame:  A2- 5 1/4 x 11 , ATC- 3 1/4 x 7 1/2

    (2) slider pieces:  A2- 3 1/2 x 4 , ATC- 1 3/4 x 3 1/8

    square punch:  A2- 1 1/4 or 1 3/8, ATC- 1 1/8 or 1 1/4

    For the ATC, the slider frame piece (3 1/4 x 7 1/2) was scored with a Scor-Pal on the 7 1/2″ side @ 2 3/8, 4 3/4, and 7 1/8.  (Trim just a smidge off the left edge if needed so that it folds nicely.)

    Have fun with it!

    stamps- Crafty Secrets Wizard of Oz; paper- black, white, red; ink- Memento Tuxedo Black, SU! Cherry Cobbler; accessories- Scor-Pal, Scor-Tape, heart punch, pop dot, crochet thread, circle punch, plastic Walmart bag, square punch, corner rounder.

    blissful atc

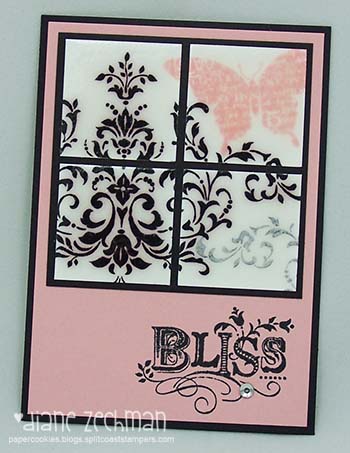
    Just popping in quick to share an ATC (artist trading card) I made for a swap.  I used the Faux Tile Technique, so the little white squares are nice and glossy! 

    A clear gemstone was placed under the word bliss to give it some sparkle. 

    Have a great night!

    stamps- SU! Bliss; paper- Basic Black, Blushing Bride, white; ink- Memento Black, Blushing Bride; accessories- Crystal Effects, clear gemstone.

    an onion anyone?

    Today I thought I’d pop in to share my ATC swap for Saturday’s event.  I still haven’t unpacked, so I haven’t checked out the ones I received yet. 

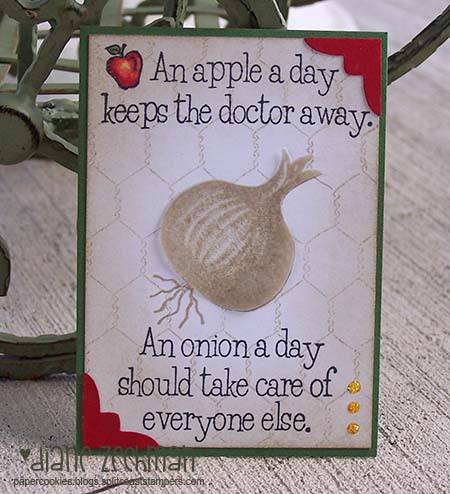
    When I saw this Hambo stamp last year, I thought it would make a funny get-well card.  But it also made a cute ATC, I think. 

    The onion was stamped onto the white cardstock and then stamped again onto a piece of vellum, cut out and layered over top. 

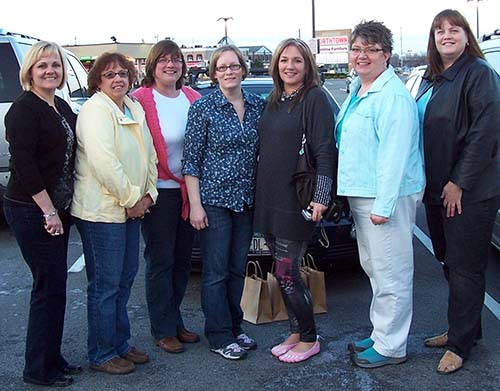
    I thought I’d share another pic from Saturday.  This one is “the girls” outside of My Tomato Pie after dinner.  It was the best dinner I had there yet…sooo yummy!  And even better when shared with friends!  No eating onions here….LOL….I ♥ spending time with them!  (check out Michele’s pink toe shoes!) 

    Lisa, Cheryl, Beth, me, Michele, Tracy, Karen

    Thanks for stopping by!

    card recipe: stamps- An Apple A Day by Hambo, tiny apple- SU! 2 Teach, onion- DD Very Veggie, SU! Chicken Wire; paper- white, red, Garden Green, vellum; ink- Memento Black, SU! Crumb Cake; accessories- Copics, Stickles, EK Success Victorian Photo Corner punch.