Category Archives: 3D and altered art

Happy Holidays! (a little late)

Hey all!  I wanted to pop in to wish everyone a Merry Christmas but time slipped away from me.  I hope you all had a very blessed Christmas!  Because of different work schedules, we celebrated with family a little early this year so Christmas seemed to creep up a little quicker than normal.

I already shared my cards for this year so here’s another project I did (and it involves paper too).  This is just a quick and super easy decorating idea that I started doing many years ago when we were first married and had little money to spend on decorations.  The past few years I haven’t done it, so it just seemed extra special this year…bringing back memories.

Here’s a low cost decorating tip…use wrapping paper (this was from the dollar store) to cover the picture frames already on your wall.  Add a bow and you have instantly transformed yourself into Martha Stewart.  LOL.

Sorry I am posting this a bit late!  But maybe you can head out and take advantage of the after Christmas sales to pick up some beautiful papers for next year.  ;0)

Have a great day!

teabag & cookie holder

Last week the Scor-Pal team hopped with Fancy Pants and today I can share my projects that were featured.

I made some quick and easy last minute gifts with Fancy Pants’ Hopscotch papers (absolutely fun prints!) that would be perfect when you need a “little something” for a coworker or friend.  The folded papers hold 2 cookies and one or two tea bags.  I chose to add a teabag in one side and a little tag in the other to write a short note.

The original design is by Debi Pippin and can be found here.  Another tutorial with pictures can be seen here.  (In step 3 of that tutorial, ignore the 6″ score as it must be a typo).  I took a few photos along the way as well…

Start with an 8 1/2 x 12 inch piece of double sided patterned paper.  Using a Scor-Pal, score the 8 1/2 side @ 2 1/2 and 6.

Next score the 12″ side @ 1 1/4, 2 1/2, 5, 7, 9 1/2, and 10 3/4.

Crease all scored lines and unfold.  Next you will cut 2 rectangular sections from each corner (cut a 2 1/2″ square from each corner) to look like this…

Now score the 4 center corners diagonally before folding them in.

After folding the center corners, it will look like this.

Fold the top and bottom in.  They will overlap each other a bit.  I added a bit of glue here but it’s really not necessary.

Flip the paper over and fold the scored lines to look like this…

When cutting the “tag shape” on the top, first fold the top flap down on each side.  I added a bit of adhesive underneath.  Then I measured 3/4″ in from each end and made a mark.

Then cut both sides to look like this.  Punch 2 holes at the top to tie a ribbon through.

Decorate and fill as desired.  I used some adorable Magnolia Minis from the Magnolialicious store.

A view from the side… fill a 4×6 cello bag with 2 cookies, add a twist tie to the top, and insert so the baggie is between the ribbon tied at the top.

And here’s the back… I added a tag but you could add a second teabag here.  Some Fancy Pants stickers adorn the tags.

The buttons are also from the Fancy Pants Hopscotch line, as well as the “believe” banner and “peace” sticker.

Thanks for stopping by!  Have a blessed Christmas!

stamps- Magnolia Minis- Snowy Hug, Santa’s Bench, Tilda in Winter Night; paper- Fancy Pants- Hopscotch, white, SU! Wild Wasabi; ink- Memento Tuxedo Black, SU! Wild Wasabi; accessories- Scor-Pal, Fancy Pants Hopscotch stickers, banners, and Mingled Buttons, Copics, Marianne Design tree die (LR0136), ribbon, Stickles, 4×6 cello bag, SU! tag corner punch.


Coredinations K-cup Caddy

Last week the Scor-Pal team hopped with Coredinations and today I can share my projects that were featured.

I made a holder for Keurig pods and a matching 3×3 notecard and envelope.

Using the Scor-Pal and Core Impressions paper (Pink Paislee- Modern Prints Collection), I put together 2 Keurig K-cup Caddies following the directions here.  First the paper was sanded to reveal the color core.  Then I attached the finished caddies back to back with some Scor-Tape to hold 4 Keurig pods.  Here’s the front side…

And here’s the other side…

A view from the top with it empty…

I also made a matching 3×3 notecard with some scraps that were left over.  A coordinating envelope was created using the Scor-Pal and Scor-Envi, following the measurements printed right on the Envi tool.  How handy is that?!

These would make a perfect little gift for a coworker or friend.  I hope you have fun making them yourself!

paper- Coredinations- Core Impressions: Pink Paislee- Modern Prints Collection, My Mind’s Eye- Be Merry (snowmen and trees); accessories- Scor-Pal, Scor-Tape, Scor-Envi, 1 3/4″ circle punch, SU! oval punch, Coredinations sanding block, ribbon, Stickles.


Let it Snow frame

Tonight the “Gigglers” (my crafty friends) are getting together for our monthly dinner out.  Usually we celebrate the birthdays for each month but since we don’t have any Dec. birthday gals, we decided to have a Christmas gift exchange.  The gift has to be low cost and hand-made or crafty stuff.  I thought I’d make another framed piece and here’s what I came up with last night (yes, I waited till the last minute! lol).  You can click on the pic for a larger view.

I used a Sizzix snowmen die and the words are a bonus Sizzlet die that came with it.  The little tree and snowflakes are old Cuttlebug dies.  On the left snowman, I made my own pattern to give him a scarf and I added Stickles to his hat.

The snowman on the right has a few buttons and some Liquid Pearls on his hat.

We will play one of those games where you pass the gifts back and forth.  I included some chocolate and bling so I hope whoever gets mine enjoys it!

paper- Bazzill red, white, Chocolate Chip, Tangerine, Echo Park Wintertime; ink- Distress Tea Dye; accessories- Sizzix Snowmen #2 and Let it Snow #2, Cuttlebug Winter dies, Creative Memories Deco Trimmer, sewing machine, liquid pearls, Stickles, buttons, glue dots.

a clutch purse box

Hello.  Today I have a tutorial using Scor-Pal products to make a clutch style purse gift box.  I was inspired to create this by the clutch I had purchased for my daughter’s wedding.  This purse box is also a variation of two other projects… a Triangle Box by Deb Felts and a Mini Bag by Silvey.  Be sure to check those out too for more inspiration.  My handy-dandy Scor-Pal and beloved Scor-Tape made these a snap to create!  I couldn’t stop at just one…

Let’s get started!  The basic supplies used are the Scor-Pal, Scor-Tape, sticky-back Velcro, and some cardstock or patterned paper.  Here I used 12 x 12 papers from the DCWV Autumn Melody stack.  Other supplies are only limited by your imagination and creativity in “dressing them up”.  I used a button, linen thread, ribbon, pearl ribbon slide, dimensional, Spellbinders Label 14, adhesive pearl, and a corner rounder.

Start with an 8 1/4″ x 8 1/2″ piece of cardstock or patterned paper.

Score the 8 1/4″ side @ 2 1/8, 4 1/8, 6 1/4, and 6 3/8.

Next score the 8 1/2″ side @ 2 1/8 and 6 3/8.

Score additional diagonal lines as shown in purple in the diagram below.

Mountain and Valley fold the scored lines to form the purse.  See photo. *Note- if you want to add a ribbon strap, do that now.  See diagram below for placement.

Apply Scor-Tape to sections as indicated in photo.

Here’s a second diagram to show placement of adhesive and holes for optional ribbon strap.

Remove backing on the tape and fold each side in.  The purse will be flat.

Open the folds to look like this…

The top flap can be left as is, or cut/diecut/punched as desired.  Fold the top flap over and apply sticky-back Velcro or a magnet to close.

Decorate as desired.

Thanks for stopping in!  Have fun with them!

Scor-Pal and Hampton Art

This past week Scor-Pal teamed up with Hampton Art and today I will share the 2 cards that I made.  Hampton Art has some great images, including this Home Tweet Home set with lots of fun images to put together.

First I created a 3-D House shaped card following the directions by our Scor-Pal design team member, Virginia Nebel.  I love shaped cards and this one is very easy to create with the Scor-Pal.  A punched circle was added to the front to turn it into a birdhouse.  The bird on the swing, along with the sentiment, was one of my favorites from the stamp set.

This house card is designed to stand up on it’s own.  A view from the top shows the folded sides.

Next I made a Z-fold card.  My cardfront was scored at 2″ and folded back.  The edge was torn and an additional torn layer was added underneath.  This fold was attached to the cardfront.  Don’t you just love the birdhouse camper?  Cute!

One great thing about clear stamps is the way you can bend them when mounting onto a clear block.  Here I curved the sentiment to compliment the shape of the images.

Thanks for joining us.  Be sure to check out all the fun projects on the Scor-Pal and Hampton Art blogs!

House card: stamps- Hampton Art Home Tweet Home; paper- Momenta Kaleidoscope; ink- Colorbox Pigment Espresso and Pink, SU! Celery marker, black Micron pen; accessories- Scor-Pal, Scor-Tape, sewing machine, 1 1/4″ circle punch, SU! Scallop Edge punch, Martha Stewart Grass punch, Stickles, SU! Curly Label punch.

Z-Fold card: stamps- Hampton Art Home Tweet Home; paper- white, Momenta Kaleidoscope; ink- Colorbox Pigment Espresso and Boysenberry, SU! Celery, Banana, Bermuda, Curry, and Razzleberry markers, brown Marvy LePen; accessories- Scor-Pal, Scor-Tape, corner rounder, Memento sticker.

baby frame

This past weekend I attended a relative’s baby shower.  Along with the purchased gifts, I also made a framed 12 x 12 page that coordinated with her baby bedding.

When I found out that she was using the Trend Lab Baby Barnyard bedding, I searched online and found these pics for inspiration…Then I found a pic with fabric squares that are used in the bedding…score!  I used it to make my own patterned paper.  🙂

The papers were carefully laid out and diecut with my Big Shot Pro and the Bigz Pro Puzzle Page die.  Then I used various Paper Smooches stamp sets for all of the animals…I just think they are so cute and match pretty well to the bedding.  The barn is from an old SU! set.  I added some Judikins “straw” to the barn and popped up the cow’s nose.  The words were inspired by a scrap page title I saw…I thought they would go perfectly with the puzzle die.

I also popped up the puppy’s feet and added the animal sound words to coordinate with the sheet in the bedding.

This was a lot of fun to create and I hope it matches the room well since I haven’t actually seen the bedding in person.

Thanks for stopping in and I hope this inspires you to create some wall art of your own!

stamps- Paper Smooches- Chubby Chums, Alphadot, Green Acres, and Party Posse, SU! On The Farm; paper- Creamy Caramel, Gable Green, Bashful Blue, white, kraft; ink- Memento Tuxedo Black, SU! Gable Green, Creamy Caramel, Bashful Blue, Brown Marvy LePen; accessories- Sizzix Bigz Pro Puzzle Page die, Copics, ribbon, Magnolia Romantic Tag and Lovely Fence dies, dimensionals, buttons, Judikins Straw Speckles, SU! flower brad, C.C. Designs grass border die, MFT Wonky Scallop Border die, PTI Cloud dies, SU! Oval punch, Cuttlebug Red Tag Sale dies, heart punch, computer font- PeggyFont.

Scor-Pal and DCWV

This past week the Scor-Pal team hopped with one of my fave paper companies, Die Cuts With a View!  I love their papers.  The leaves have changed colors here and the weather is turning cooler.  It was perfect timing to work with the Autumn Melody paper stacks!

I don’t drink coffee so for me, cooler weather brings cups of hot tea, spiced cider, or hot cocoa.  Yum!  For my project today I made a Tea Dispenser Box and matching card…perfect for a little gift.  The Scor-Pal and Scor-Tape make it oh-so-easy to create!

There are a few different tutorials on the net to make a tea dispenser box.  One of the easiest (and having the least waste of paper) is from my friend, Heidi…you can view her tutorial here.  She altered some instructions that were in metric to create her own version.  For the tea box that I made, I used Heidi’s directions and slightly changed the measurements so I will include those below.  I just prefer to have the 1/16″ measurements in my cutting rather than my scoring.

Here’s a few close-ups…for the box base I used a patterned paper with a gorgeous gold leafy/flourishy pattern on it and some matching cardstock.

The lid has a coordinating patterned paper around the edge, a tag cut from one of the papers, some leaf brads, and a rosette made from coordinating paper.  You can find all you need to know about creating rosettes in the new Scor-Pal book, Score, Fold, Create! I scored a 5/8″ x 12″ piece of paper every 1/4″.

The lid comes off to fill the box with tea.  I had an extra teapot so I added it to the inside of the lid.

The left side of the box didn’t have as much gold foil design so I dressed it up by adding some little teacups diecut from the same papers.  The bottom teacup and teapot are popped up on dimensionals.

Last, I made a simple 4 1/4″ square offset gatefold card.

The patterned paper was heavy enough to use for the card base…love that!  I started with a 4 1/4 x 8 1/2 piece and scored the 8 1/2 side at 1 1/2 and 5 3/4.  The bottom cup is popped on a dimensional.

For my tea box, I used the following measurements:

I started with 6″ x 12″ and scored the 6″ side at 1″ (same as Heidi’s).  Then I scored the 12″ side @ 3 1/8, 5 3/4, 8 7/8, and 11 1/2.  I cut a segment from the second section per her directions.  Then I adhered the patterned paper layers and assembled the box.  Additionally, I cut a 2 5/8 x 3 1/8 inch piece of patterned paper and adhered it inside the box to line the bottom and cover the flaps from the base.  Then I attached the box to a chipboard base which was covered with cardstock.  My chipboard base measures 2 7/8 x 3 3/8.

For the lid, I used a 4 3/16 x 4 11/16 inch piece and scored it at 3/4″ on all sides as directed.

Thanks for looking and be sure to check out all the projects on the Scor-Pal and DCWV blogs!

stamps- MFT Always Time For Tea; paper- DCWV Autumn Melody stack & Cardstock stack, shimmery white; ink- Groovy Guava, Cajun Craze; accessories- Scor-Pal, Scor-Tape, leaf brads, 3/4″ circle punch, MFT Always Time For Tea Die-namics, Liquid Pearls.

props, decor, etc.

Lots of pics today…hope I’m not boring you with them!  I’ll be back to making cards real soon…promise!  Here’s a mish-mash of wedding  projects.  I’ll try to limit the chit chat.

A good friend loaned me a birdcage from her daughter’s wedding and I decorated it to hold the cards at the reception.

I diecut the sign with Heart Nestabilities and stamped them with Stampin’ Up!’s retired set called Carte Postale.

I typed, diecut, and added bling to these signs for the head table. (Labels 8 Nestabilities)

Wrote on some gourds…

I placed an old window onto an easel and attached string to hold the table cards (diecut with Labels 8 Nestabilities).  I didn’t get a pic at the reception.  We placed some straw, a pumpkin, a basket of gourds, and a pitcher with flowers by the window.

I made simple tags for the bridesmaid’s gift bags with the Magnolia Romantic Tag Doohickey die…and we glued a flower for their hair to a hairclip, then added some sparkle to the centers.

Altered flip flops for dancing at the reception…we made ribbon flowers with a pearl brad in the center and stitched them in place.

Altered some mason jars to hold the bridesmaid bouquets at the head table…

We also had a photo area at the reception with props to take silly pics.  Here’s a few that we made.  I found the sign on the internet.  We just printed it and placed it in a frame.

The bride and groom signs were printed from here.  I diecut them with Grand Labels Eleven Nestabilities.

We also made a big polaroid frame…

We used years for the table numbers and had photos of the bride and groom at that age…the last few years had pics of them together.

There are a few other projects that I didn’t get pics of.  I actually didn’t take any pics on the big day.  I wonder why.  lol.  I do have one other thing to share though…the cake!  I was anxious to see it and our baker did a wonderful job!

Here’s DH and I with our daughter and new son.

I can’t believe it’s over already.  Now to clean and pack things back up!  Have a great weekend!

candle favors and candy buffet

When it comes to making favors, there are so many ideas to choose from!  DD decided that she wanted little candles so we stamped on tealights and placed them in little tins that I had left  from when I was making these ornaments.

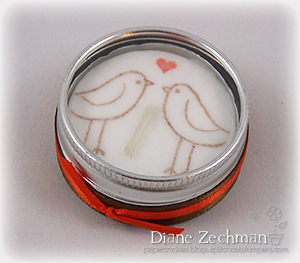
These are so easy to make!  Just place a piece of tissue paper between 2 pieces of copy paper and punch it out with a 1 3/8″ circle punch.  (The copy paper aids in punching out the tissue) Then stamp your design onto the circle of tissue paper.  We used the same birds that were used on the invitations.  Then I used a piercer to poke a hole in the center.  Lay the tissue over the candle, pushing the wick through the hole.  Then apply heat with a heat gun and the tissue melts right into the top of the candle.  We finished off the tins with some ribbons and placed their names & date on the bottom.

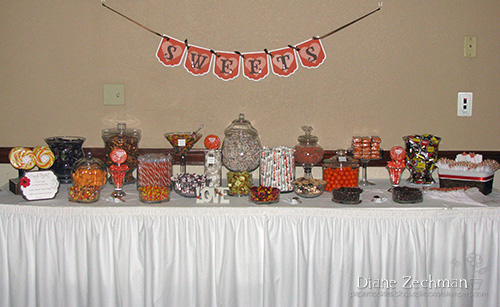
As part of their favors, we also put together a candy buffet.  That was a lot of fun!  We shopped for glassware and tried to keep the candy in fall colors…mostly orange and brown for the colors of the wedding.

In the jar on the top left, we colored the letters “HE” and “SHE” on the Hershey snack size bars with an orange Sharpie marker.

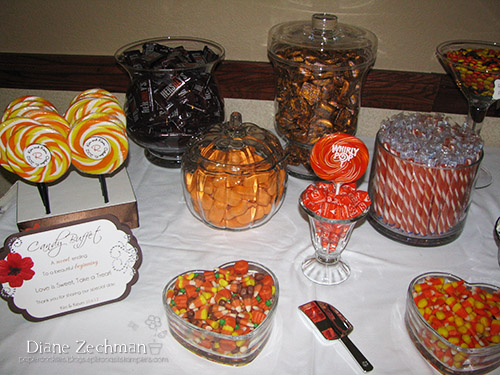
In the large jar in the back, below, my MIL found white coated pretzels, drizzled with orange and brown…perfect!  And the Lifesavers mints (with the Whirly pop on top) are my new favorite…orange flavored!  I could only find them at CVS.

I like the look of the giant orange gumballs too.

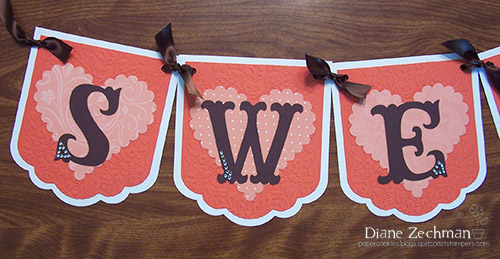
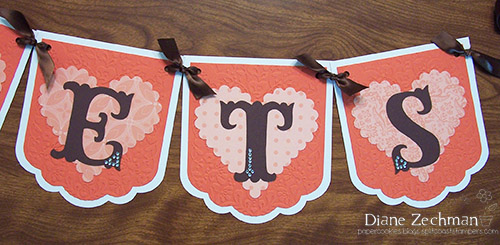
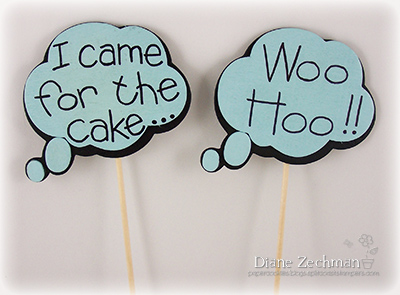
A last minute project was to make a banner to hang over the table…

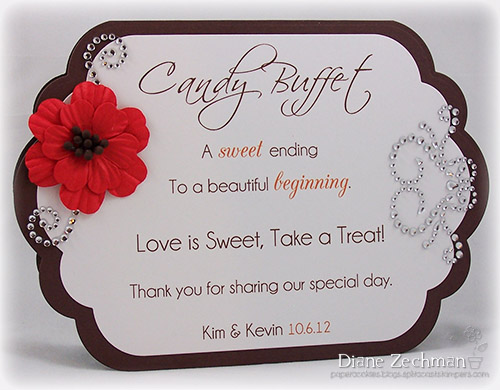
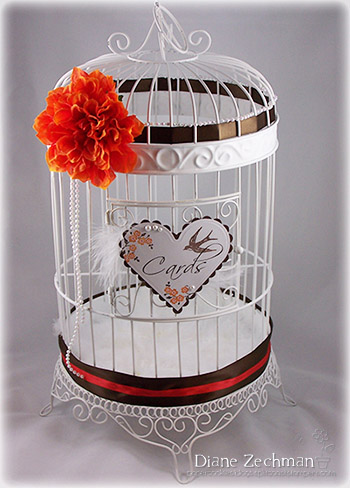
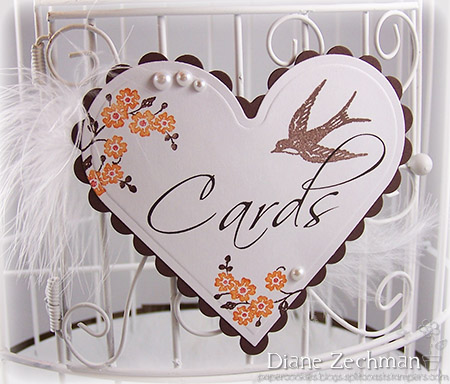
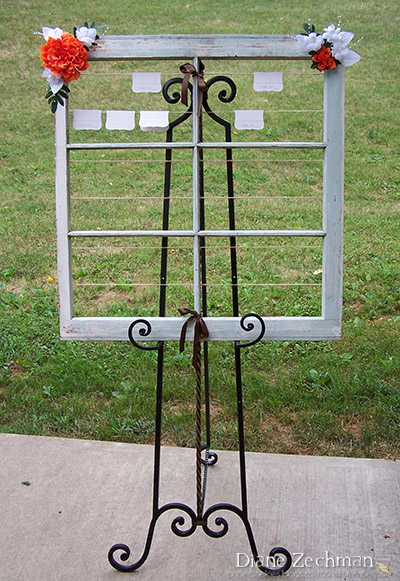
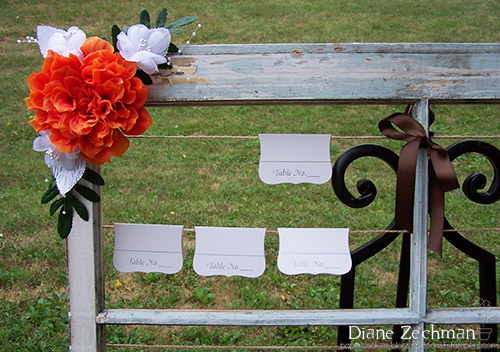
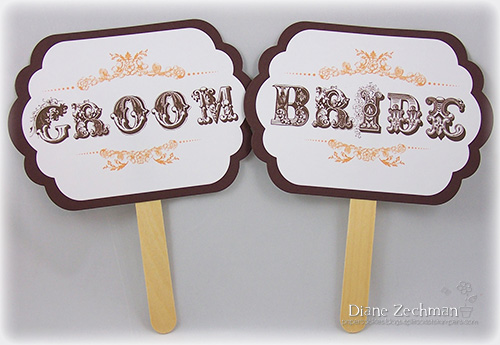
I also made a sign for the table…

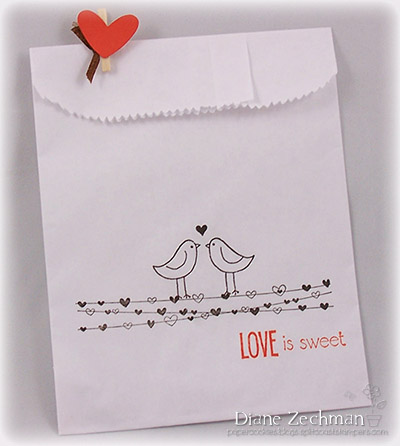
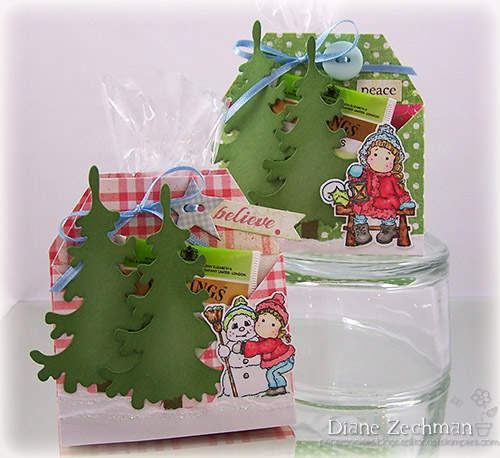
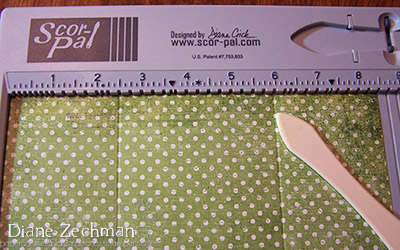
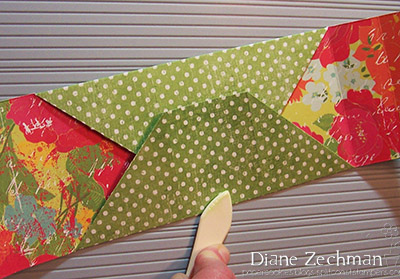
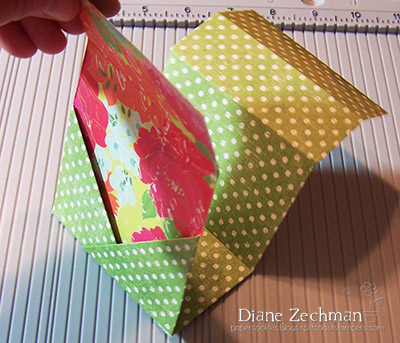
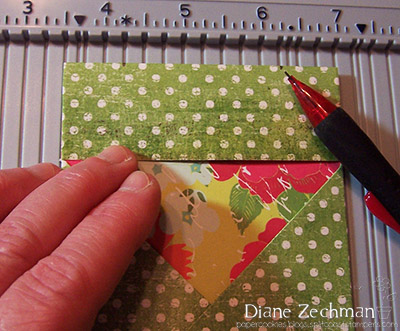
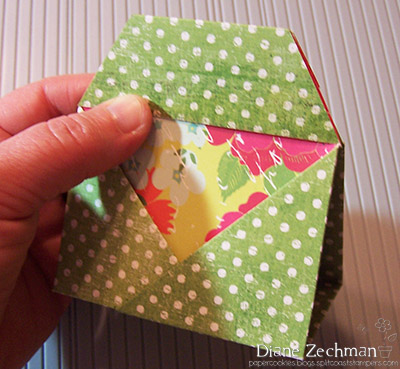
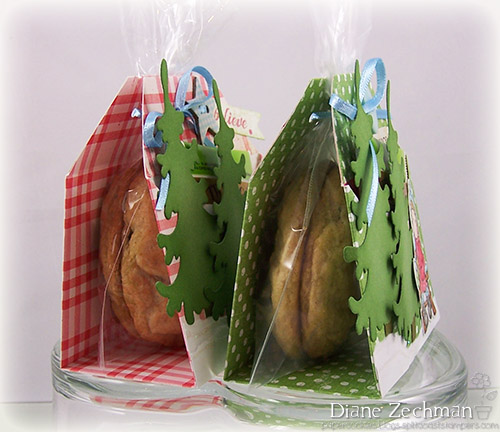
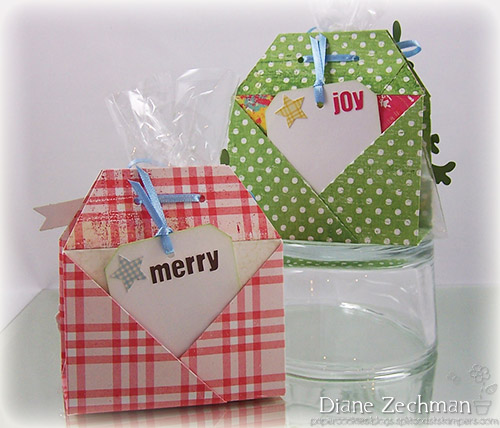
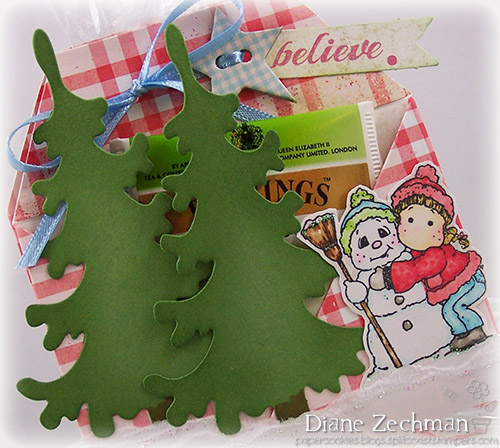
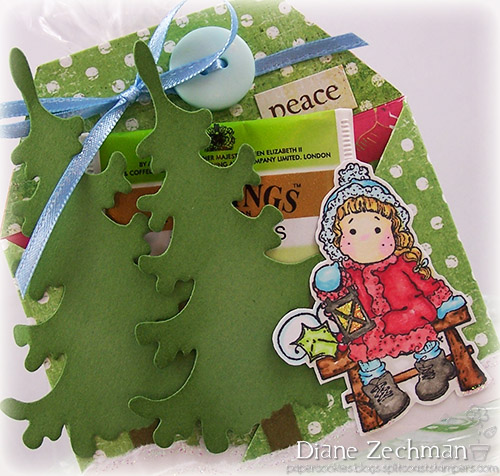
…and decorated some glassine lined bags for the guests to fill…

Those giant lollipops in the photo above were actually a Halloween candy I found…and they SPIN just like a pinwheel!  I bought enough to fill the whole display box so I could take that home too.  lol.  I pulled the styrofoam base out and wrapped it with ribbon.  Here’s what it originally looked like.

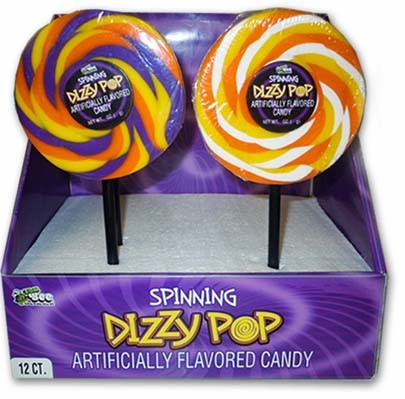
And after it was altered…

One little boy was so fun to watch, licking away at his spinning pop!

That’s all for today but check back…still more projects to come!

Tea Light candles: stamp- SU! Love You Much; ink- Memento Rich Cocoa, SU! Dusty Durango; accessories- tin, tissue paper, heat gun, 1 3/8″ circle punch, ribbons, glue dots, tea light candles.

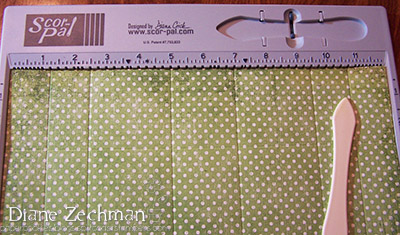
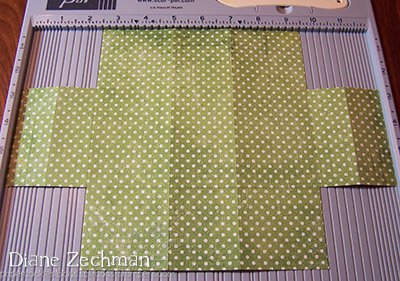
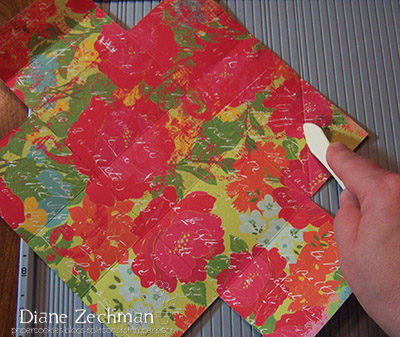
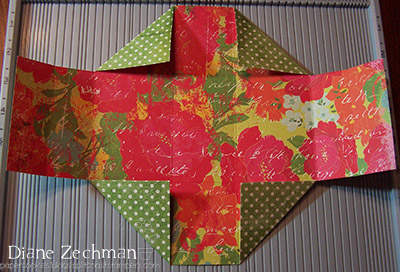
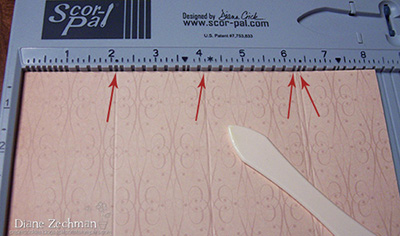
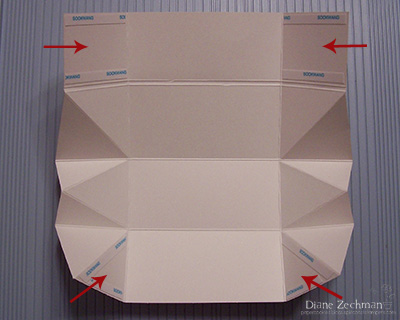
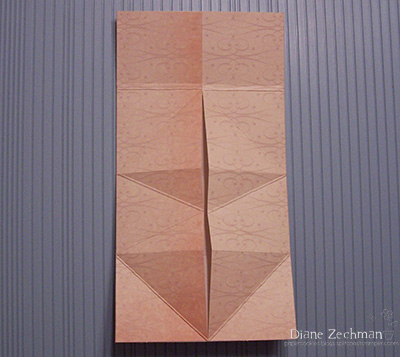
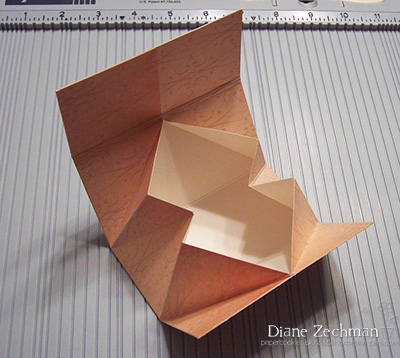
Candy Buffet sign: paper- Choc. Chip, white; accessories- Scor-Pal, Scor-Tape, Spellbinders Grand Labels Eleven, The Paper Studio flower, adhesive rhinestones.

Treat Bags: stamps- SU! Valentine Defined and Love You Much, Studio G sentiment; paper- Tangerine Tango; ink- Stazon Timber Brown, SU! Tangerine Tango; accessories- SU! heart punch, glassine lined bags, Scor-Pal, mini clothespins, ribbon.

Sweets Banner: paper- white, Tangerine, Choc. Chip, Groovy Guava dsp; accessories- Spellbinders Grand Labels Eleven, Cuttlebug Meadow Lark folder, Heart Nestabilities, Cricut Storybook, gemstones, ribbon.