
Happy Monday! :0) Today I have a tutorial for you on how to stamp on baby onesies and color them with Copics.
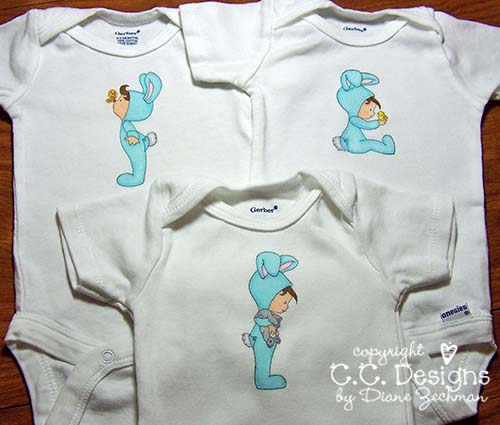
I made these onesies for a baby shower using the Baby Bunnies from All That Scraps. It really is quick and easy…and lots of fun! So let’s get started…
Supplies needed:
onesies, cardboard / paper scraps, permanent ink (discussed below), stamps, iron, Copic markers.
First you need to wash and dry the onesies (or any other fabric you use) to remove the sizing. (Sizing is the process manufacturers use to make the fabric stiff) This will help keep your inks from fading.
Next, iron the fabric so you have a smooth surface to work on and a nice finished product.
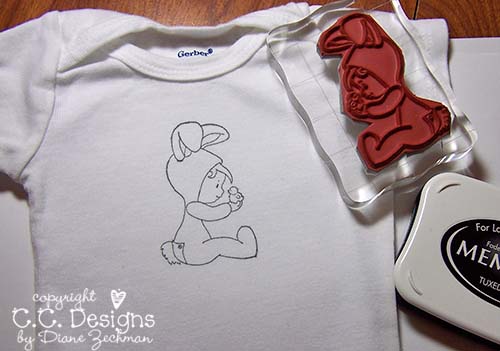
After you have ironed the shirt, slip a piece of cardboard inside to make a harder surface to stamp on and also to prevent your ink from bleeding through to the back of the shirt. I also slipped a piece of white paper inside.

Next, stamp your image using a permanent ink. Make sure that your stamp is well inked for good coverage.
If you are planning to color it in with Copic markers, then Brilliance or Memento work well. If you are using a solid image or don’t plan to color with Copics, then Stazon inks work great too. Just remember to not use Stazon inks along with the Copic markers as they are not compatible.
After stamping the image, let it dry and then heat set the ink with your iron about 5 seconds.
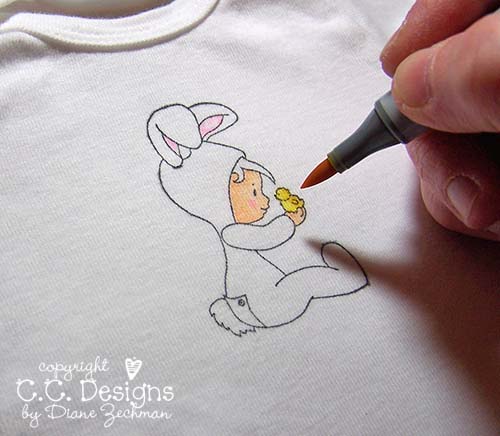
Now you are ready to color. Coloring on fabric with Copics is not quite the same as coloring on paper. You don’t have the smooth, fluid movement with the marker as you do on paper. And it isn’t as easy to blend your colors, so if you want to use different shades together, I’d suggest keeping your numbers as close as possible.
When working on fabric, you need to start in the middle of the space you are coloring or at least stay away from the lines until you see how far the ink will spread. The fabric will wick the ink and if you color too close to the line, it will seep over it. It’s not difficult, just be careful. You can go back and fill it in if needed. If you want to try it, you might be able to iron the image as you color and the heat would hopefully help dry the ink faster, therefore reducing the amount it spreads.
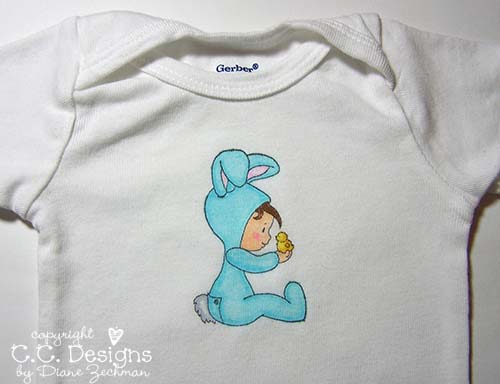
Here is my finished image….I heat set it once again when I was done.
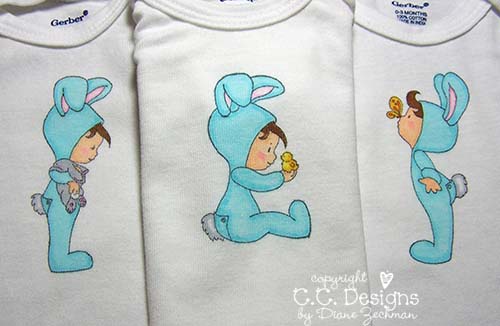
And here’s a pic of all three bunny tees….
Variations:
You can also add buttons, beads, stitching, ribbon, etc. But I chose to leave them plain…I think those accessories would look much cuter for a girl. ;0)
Fabric paints can also be used but I would suggest applying them with a stencil and a brush to get a thinner layer. Fabric paints tend to dry hard and stiff, crack and peel over use and will stick on itself when folded. Not something you want on your baby’s soft skin.
Fabric markers would be a good alternative to the Copics. Be sure to test them before applying to your project.
 cookiestamper ♥


Pingback: Challenge No. 27 ~ Coloring Other Surfaces « Copic Creations