
 Good morning!
I have lots to share today… in this post I have a puppy card preview and a tutorial for cutting “out of the box” with the Nesties. Then don’t forget to scroll down to my other post today for the next Stampavie challenge!
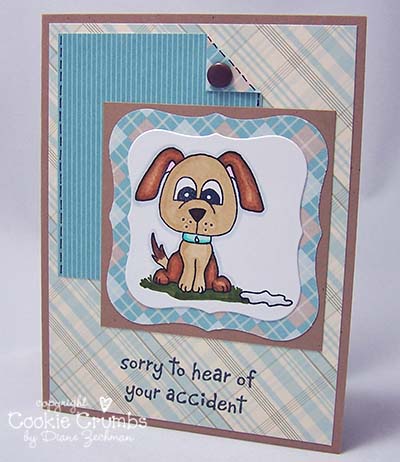
This puppy is another image in my Get Well Critters set that will be available *tonight* at 10 pm on the All That Scraps site!
He is the image that started the whole set since I was asked (a very long time ago) to make a card for someone who had an accident. I never did get around to making that card…oops! Well, now I’ll be ready the next time I need one! LOL.
I couldn’t quite bring myself to color the puppy’s “puddle” yellow, so I left it white. ha ha. I hope this image and sentiment doesn’t offend anyone….it is meant to be humorous. If you don’t like the puddle by him, just cut it off…no worries! Did you see the super cute card that Dawn made? She omitted the puddle and gave him a bandaid from the set- so cute! (And be sure to check out the other samples in the ATS gallery…Jay Jay even stuck the Chicken in bed instead of the pig!)
I hope to see you tonight on the ATS board…there will be a chat at 8 pm before the release.
stamps- Get Well Critters by Cookie Crumbs; paper- Kraft, White, dp- SU! Manchester; ink- Memento Black; accessories- Copic markers, Labels 1 Nestabilities, brad.
____________________________________________________________
“Out Of The Box” with Nestabilities
 Next…here’s a card I made with Christine’s cute Bugg-a-boos set. (And the words are from AmyR’s Beach Sentiments set.)
I used paper piecing on her tummy and paper piercing on the corners, around the sentiment, and also to make a butterfly trail.
And I don’t have the Copic airbrush, so this time I tried adding some yellow highlights around her with a stipple brush. I’m still experimenting with this. I’m not sure if I like the stipple brush more or the air art tool. I do like the control I had, though, with a stipple brush.
The main image was cut out using an “out of the box” technique. I’ve had a few friends ask how to do this, so I thought I’d do a quick tutorial.
Now, there are several ways to do “out of the box” techniques. You can take an image and use it in a different way…such as turning a flowerpot upside down for a hat…or stamping a heart several times in a circle to make a flower, etc. Or you can think outside of the box and make a green heart or a brown flower, etc.
But this time I used a different type of “out of the box” where you leave part of your image hanging out from the panel that it is cut out of. Did I make sense? In other words, here I cut out my butterfly girl but I cut around part of her wing so it sticks out beyond the shape I cut her in. This technique is quite easy but it is just a bit tricky to visualize when you are using the Nestabilities. So I took a few quick photos when I made this card and I hope they help to make this technique easier to understand. It really isn’t difficult and I encourage you to try it!
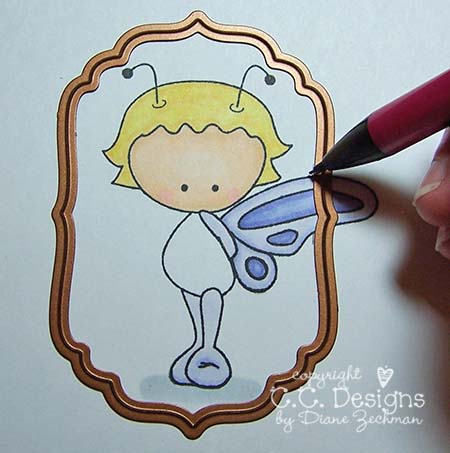
First, lay your Nestability shape on top of your image where you want it to cut. Then, using a pencil, mark a small line on the inside of the die… above and below the section you want to leave hanging out.
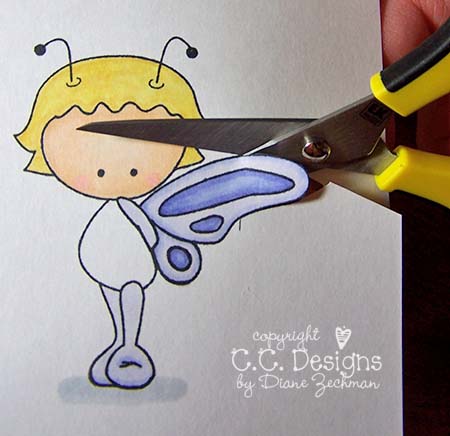
Then remove the die and with a pair of sharp pointy scissors, cut from the edge of your paper up to the line you drew. Then cut around the section you are letting hang out. Here I cut up to the lines and then cut around the tip of the wing.
Next, place the die back into position, with the cutting edge down. When you slide the die into place, lift the section you are letting hang out so that it lays above the die. This will keep it from being cut off when it is put through the die cut machine.
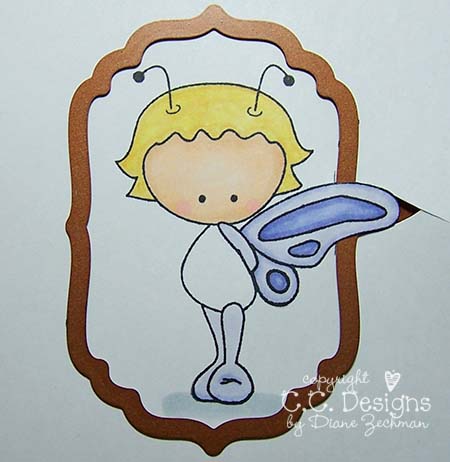
Now you just sandwich your image and die with your cutting plates and run it through your machine. When your image is cut out, remove the die and erase the pencil marks you drew.
Here’s the finished card again:
I hope this was easy to understand and I didn’t confuse you! It is such a fun technique…I hope you try it if you haven’t already.
stamps- Gingersnaps Bugg-A-Boos by C.C. Designs, AmyR Beach Sentiments; paper- White, Lilac, Saffron, Amethyst dp; ink- Memento Black; accessories- Copic markers, ribbon, Stickles, Labels 4 and Butterflies 2 Nestabilities, stipple brush, SU! Horizontal slot punch, paper piercer, SU! Priceless brass template.
 cookiestamper ♥


Pingback: » caught a bug?
Pingback: » a friendly gift
Pingback: a friendly gift | Stampavie Design Team
Pingback: WSC31-Die cuts